
Bass Guitar Hip Hop Lessons
Develop groove, improve your timing, and learn how to play bass in the pocket for hip hop and R&B.
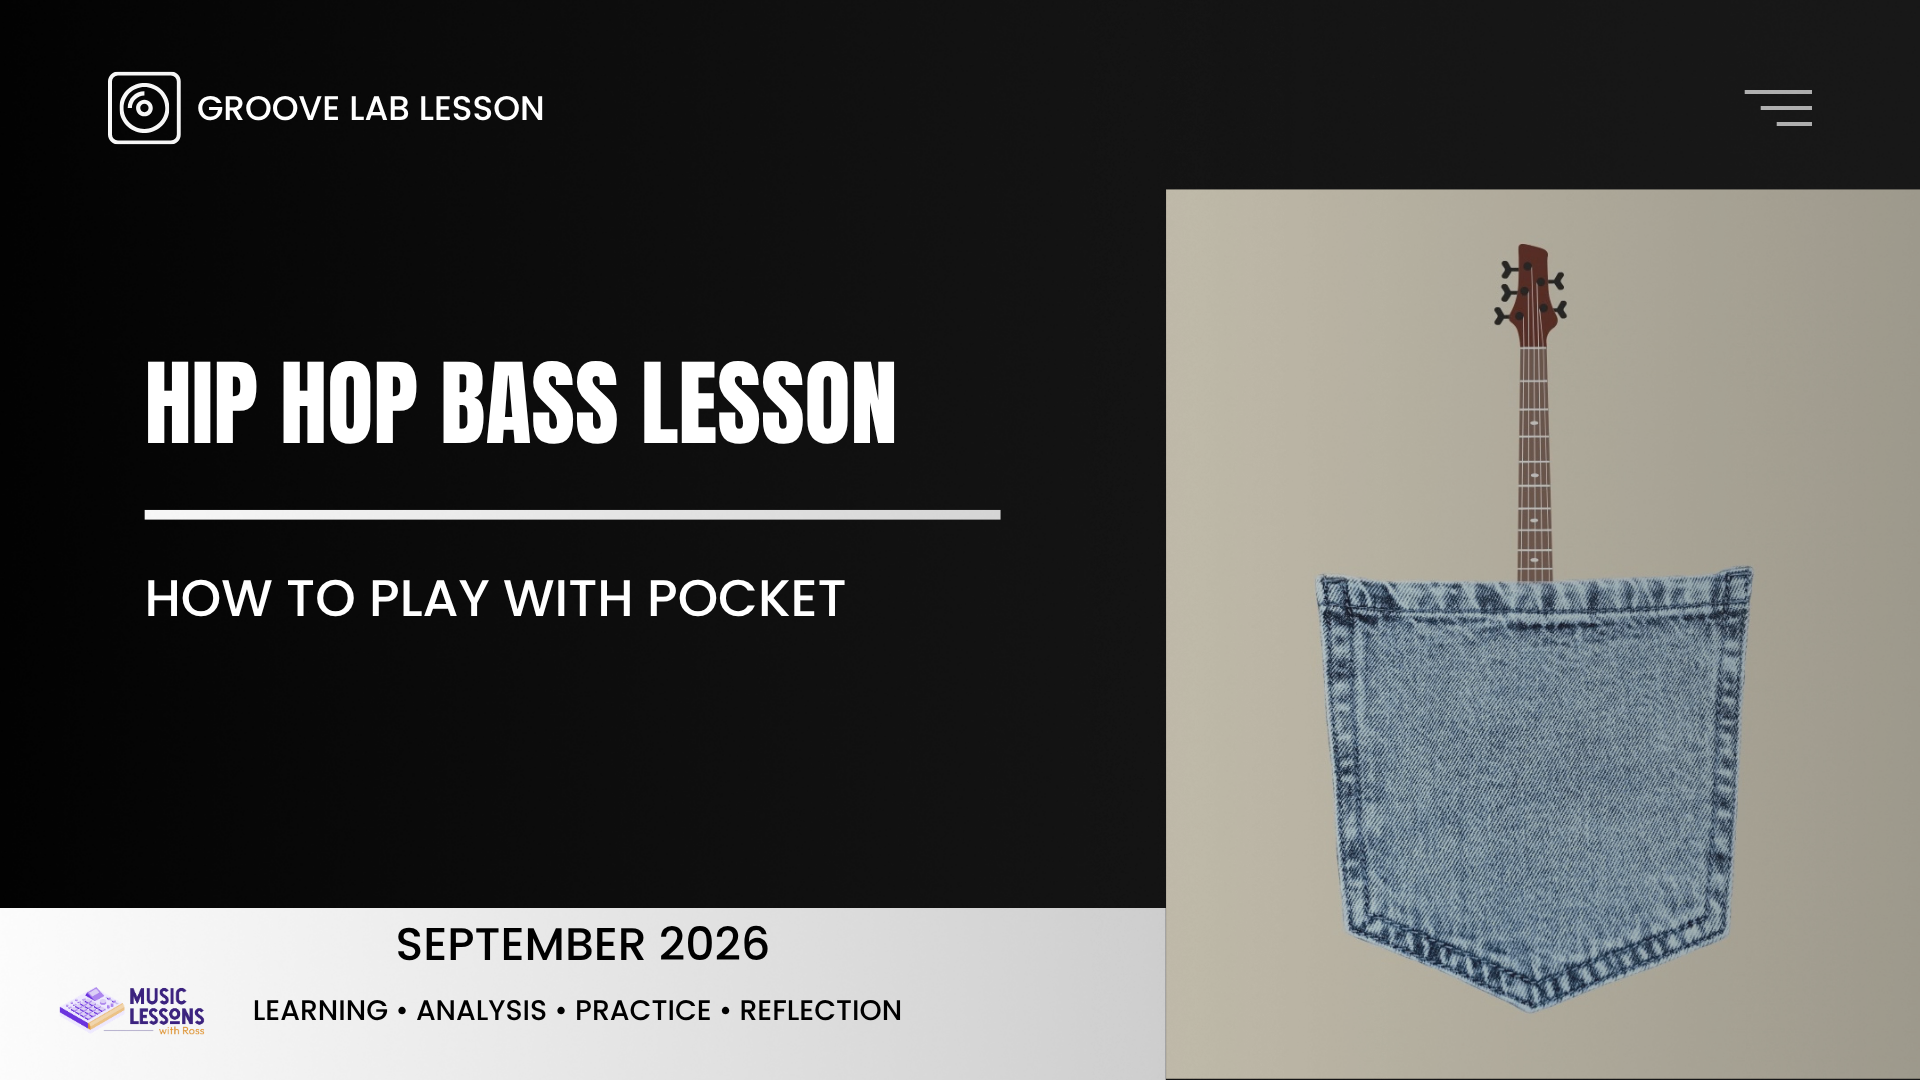
Hip Hop Bass Lesson: How To Play With Pocket
Feel the groove, play in the pocket, lock in with the drums. Bassists of all ages and experience levels have heard these directions countless times. They are accepted instructions for playing with better rhythm, but there is a problem they all share. They aren’t instructions at all, just vague concepts that often lead to more confusion than coherence.
What exactly is pocket and how do I use it to write bass lines?
Pocket is the space bass leaves for the drums to fill.
This lesson will outline the Groove Lab method for playing with pocket informed by Hip Hop groove. The system outlined is not an exhaustive set of rules that will always create the appropriate rhythm for a given song. Instead, it will help answer why bass notes belong on the down beat of one, and where to place 16th notes in a rhythm so they don’t feel random.
Common Pocket Mistakes
Interacting with the kick drum is the source of many mistakes from bassists. One extreme is copying the rhythm of the kick drum too literally. So be mindful that you aren’t playing with every single note of the kick drum. The one place that most songs need the bass to follow the kick is on the down beat of one. This comes directly from the tradition established by James Brown and carried on through George Clinton founder of P-Funk, through their mutual collaborator Bootsy Collins.
The kick is providing the foundation of the pulse in a piece of music, matching that pulse at key points is a necessary responsibility of the bass. Knowing that the down beat is the literal most important beat the kick plays will assure your rhythm supports the song.
The other end of the extreme is when the notes a bass plays line up with the kick, but don’t consider the duration of their given note. Staccato, or short phrasing often created through muting, allows the bass to add pitch to the hit of the kick. See the Bass Muting: Stop Unwanted String Ringing lesson for a deeper exploration in how to use muting. This way the notes reinforce the rhythm without reducing the energy that the drums are establishing.
Interacting with the snare drum is another source of mistakes for bassists. The problem is playing on or with the snare at all. Other styles or approaches may accommodate this choice, but the Groove Lab approach to pocket does not. The snare provides the “backbeat” rhythm equally foundational to the pulse of a song. The best way to support that is to play around those beats.
Think of the notes a bass plays as a pocket, and the snare hits are what is placed inside of the pocket. This creates space for the snare while still being complementary rhythmically.
Guiding Principles That Build Rudiments
An important step in writing a bass rhythm is mapping the kick and snare drums visually, use the Rhythm Road Map lesson for direction on this step. That map is useful in deciding where to place the bass notes and seeing how they relate to the drums. Follow these principles as closely as possible.
Play on the down beat of one any time the kick does. This anchors your presence in the pocket directly by locking in with the kick.
Use staccato wherever you land with the kick. Short, clipped notes keep the low end punchy instead of blurring into the next hit.
Never play on the snare. The snare owns that moment. Stepping on it muddies the backbeat and fights the drummer for space.
Play 16th notes immediately before and after the snare. This is what makes the pocket feel alive instead of mechanical.
Use these four rules to build a rudiment, a short and repeatable rhythm, for each measure of your drum map. Any time the drum pattern changes, write a new rudiment to match. Do this across a full phrase and you end up with a pocket-centric bass rhythm that’s built to interact with the drums not just sit next to them.
if the 16th note phrasing around the snare feels inconsistent when you play it, simplify: just play the + right after each snare hit instead. It keeps the spirit of the principle without demanding more precision than you’re ready for yet.
At this stage, the goal is execution, not revision. Film yourself practicing each rudiment and run it through the Groove Lab Practice Cycle to spot and fix accuracy issues. The rhythm itself doesn’t need to change, that can come later or not at all.
Pocket Isn’t Magic, It’s a Framework
“Feel the groove” was never bad advice, it just left out how. Pocket isn’t something you either have or don’t. It’s the result of specific learnable choices: locking the downbeat with the kick, using staccato phrasing, and leaving room for the snare to breathe.
None of this replaces your ear. It gives your ear something concrete to check itself against. Once you can consistently build a rudiment from a drum map using these principles, you’re no longer guessing, you’re constructing a pocket on purpose, every time.
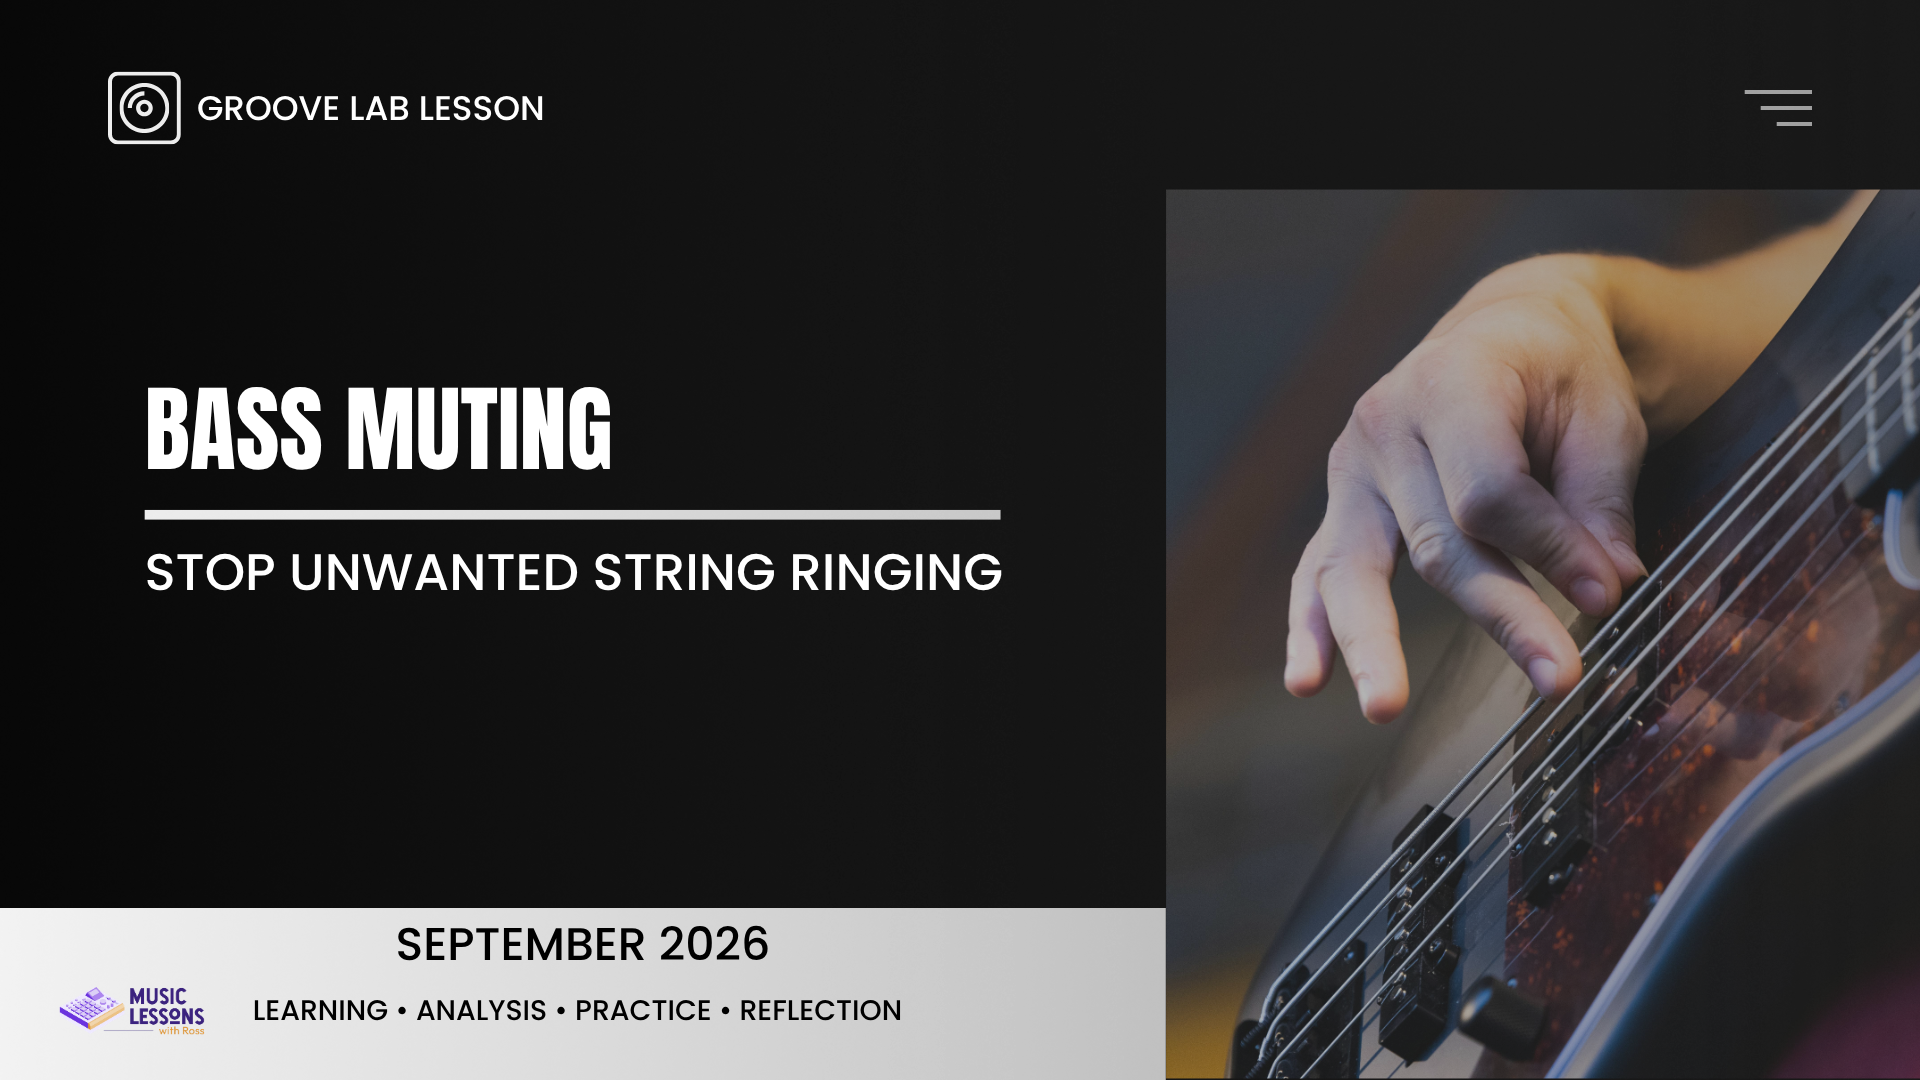
Bass Muting: Stop Unwanted String Ringing
Better Groove Comes From Better Technique
As a learner you have likely experienced this problem; you’re playing the right notes with solid rhythm, but when you switch between notes the last note you played rings out after you’ve already moved on. This may be especially true when the notes are not on the same string. This ringing can range from a mild annoyance to fully distracting. Unwanted string ringing is more than just annoying, it can drain the energy of your groove, or leave a note to clash with the other notes. Fortunately, there is a simple fix that can give you total control over the length of a note ringing out. The technique is called muting, learning it will solve your ringing issue, and improve your overall groove too, by leaving intentional space for the drums and giving you a way to create textured articulation in your bass lines.
Muting is the technique of stopping a string from ringing after it’s played, giving you control over how long each note lasts.
There are multiple ways to mute a string. This article focuses on plucking-hand technique because it lets you directly control note duration independently of your fretting hand.
Anchor With The Thumb
This muting technique relies on the thumb anchoring the hand into position, and sometimes doing double duty by muting unused strings. Whenever you play the lowest pitched string on your bass, the thumb should be touching the body of the bass. When you move to higher strings, the thumb should instead be anchored to the nearest neighboring string. For example, when you play the A string, the thumb should be anchored to the neighboring E string.
The reason the thumb moves to and then anchors to different strings is to control each string by keeping it from ringing unintentionally.
Use the following exercise to practice switching between strings and moving your thumb to the nearest neighbor.
Pluck with your pointer finger
Pluck with your middle finger
Anchor your thumb on the ringing string
Bring your pointer finger to the next string
Repeat
Watch this video demonstration for visual guidance.
Muting With Plucking Fingers
Now that your thumb can comfortably anchor on lower neighboring strings, let’s discuss the actual muting technique itself. Using alternate plucking with the pointer and middle fingers, each finger mutes the ringing string right before its own pluck. To mute, simply touch the ringing string until the ringing ends. Whichever finger muted last will be used next to pluck.
Pluck with your pointer finger
Mute with your middle finger
Pluck with your middle finger
Mute with your pointer finger
Repeat
Watch this video demonstration for visual guidance.
Muting When Moving Across Strings
The thumb anchoring and plucking finger muting are especially useful when used to move across neighboring strings. Follow this drill to practice the two techniques combined.
Pluck with pointer, mute with middle
Pluck with middle, mute with pointer
Anchor thumb on that string
Move to the next string
Repeat
Watch this video demonstration for visual guidance.
The Importance of Slow, Deliberate Practice
Practicing With Intention
If you’ve ever felt like no matter how much or how hard you practice, you still don’t see the results you want, then you are not alone. Many beginning and even long term musicians have struggled with this at some point in their journey.
The expectation that, if I show up consistently, and put in the work, then I should see results, makes total sense.
So the question becomes, why am I not improving no matter what I practice?
If you can relate to this problem then this article is for you. The problem likely isn’t your discipline, or even musical ability. The problem may be your pace of practice.
Practicing on Autopilot
If you’ve ever faced this problem you may have noticed practicing begins to feel like a chore.
Once that starts to happen, you start to rush through the work. Instead of paying attention to what you’re actually doing, the goal becomes getting through it.
Each drill and exercise are something you “survive”. You mentally check out, go on autopilot, and disconnect from the process just to make the discomfort go away.
The problem is that, you put in the labor and spent the time, but you didn’t intentionally engage with the process.
This leads to disconnection from the physical process, and eventually forms and reinforces bad habits.
You didn’t get 10 reps of the drill, you put 10 reps into the bad habit.
That’s what makes this cycle so frustrating. You may not even realize the habit is forming until it starts to get in the way of your playing
Then you’re left wondering:
“Why am I stuck? Why can’t I get it right?”
The Simple Solution
The answer is remarkably simple, slow down and practice with intention.
This allows you to focus on each step of the process, and because you are often training the body and brain to work in new ways, is incredibly effective.
Two things make this approach effective:
Play at the speed your brain can keep up with.
Limit how many moving pieces you are working through at once.
If you can’t mentally keep up with what your body is doing, and why, then you are moving too fast. It takes a different kind of discipline to sit with something and find that pace that your brain is comfortable with.
But over time muscle memory takes over, the point of going slow is that the muscle memory you build is based on correct technique and good habits.
If you try to improve every element of a drill at once your brain gets overwhelmed and starts to check out. Even the simplest drills on the instrument require the coordination of multiple skills to execute.
Allow your self to practice a drill and only focus on, or evaluate, one of those skills at a time. Every other element is “allowed” to make mistakes, while you reinforce the prioritized skill. This creates an “on ramp” approach to getting multiple skills to feel balanced as you play.
Why Does Slowing Down Feel Like I’m Falling Behind?
If slowing down feels like falling behind remember that may be a response to pressures you’ve internalized. We’re often taught to value outcomes more than the process. Progress is measured by how fast we finish something, how much we can accomplish, or how quickly we move on to the next challenge.
Music doesn’t work that way.
Learning an instrument requires your brain and body to coordinate multiple skills at the same time. That takes attention, repetition, and patience. Things you can’t force to happen faster.
Setting good practice routines based on intention and attention to detail won’t let you treat learning like a sprint. Treating practice like a race is one of the things that causes practice to become a chore in the first place. Nobody wants to grind day after day with little to no results.
In truth speed does matter in music, but it is a result of accuracy. If you prioritize correct technique and intentional practice now, you’ll spend far less time trying to correct mistakes and bad habits.
What This Looks Like in Practice
The skill and discipline of using slow intentional practice is useful at any stage of learning. It becomes transformative when used to identify and correct mistakes. The Groove Lab Practice Cycle offers a step by step approach to optimizing your practice efforts.
The next time you sit down to practice pick a small concept to work on, practice it slowly, and narrate every note you play or action you take. If you can’t narrate your practice you are still going too fast. Record your practice so you can honestly review your execution.
If this sounds like something you are struggling with bring it up in your next lesson and I can help you slow things down.

Online Music Lessons: What Makes Them Worth Paying For?
Are online music lessons really worth it, or are they just a lesser version of in-person lessons?
Music lessons have traditionally required you to be in the same room as your teacher. Technology has changed what is possible by giving us access to teachers all over the world, not just those in driving distance. That access is what makes online music lessons so potentially valuable. So what makes online music lessons worth the time and money, and are there possible benefits to online music lessons that in-person lessons can’t offer?
What Actually Makes Online Lessons Worth It
The number one thing that makes online lessons worth it is the opportunity to work with teachers who offer specialized lessons around niche genres and techniques. It is incredibly common to find guitar teachers who can teach Classic Rock, or piano teachers who can teach Classical repertoire. If however, you want to find lessons on genres like Jazz, Flamenco, or Hip Hop, that can be either difficult or impossible depending on where you live. That’s true for Hip Hop bass instruction, for example, it’s rarely taught in traditional programs. Working with online teachers allows you to find the most qualified and specialized instructor that fits your exact interests and skill level.
Access to specialization alone isn’t enough to make a teacher worth your time or money. What really makes online music lessons worth it is when the teacher actually offers an in-depth and structured system. Instead of learning random disconnected lessons and musical techniques the best teachers take you through a step by step journey. This way learners always know what to study next, and leave with real world skills not isolated academic knowledge.
A distinct advantage to learning online is the ease of recording each and every lesson you have. The ability to document and reference lessons afterward is a real benefit. Lessons are often fast paced and can be dense in terms of concepts, vocabulary, and techniques. Being able to rewatch the lesson, instead of relying only on notes or memory, is what makes this genuinely useful. Taking notes is also encouraged, but can be a distraction in real time, and working from memory alone makes learning challenging.
Another advantage online music lessons have, is the flexibility and comfort to learn from home. This allows students to stay relaxed and be more attuned during the learning process. Instead of being in an unfamiliar environment they can study in the same space they practice in. Staying at home also reduces the stress and cost of travel. Lessons are easier to attend and don’t require packing up instruments and materials. The classic problem of “I forgot my sheet music” becomes almost irrelevant when studying from home. These are examples of the reduced friction between lessons and practices that online music lessons offer.
Online vs In-Person Learning, Which is Better?
These advantages don’t mean online music lessons are inherently better than in-person lessons. Online lessons rely heavily on technology, which is not always dependable. Also, younger students may need more engagement and accountability than what remote lessons offer. The truth is no system of learning is perfect or infallible. The real test of any education approach is the system that it offers. So online music lessons excel at giving you diverse options for finding that teacher who offers what you need.
Opportunities For Homeschool Students
Learning music is a great addition to any curriculum, and online lessons offer unique opportunities to homeschool students. Public schools offer great instruction and skilled educators. The gap is that they have to offer programs to serve a broad population. It’s less likely that they offer one-on-one instruction, or that they can teach every genre or instrument a student is interested in. Online lessons offer solutions for these problems with the added benefit of simplified access. This allows a more inclusive take on what music lessons are and who they are for.
The flexibility of homeschooling is especially interesting, in that lessons can be scheduled around other coursework. This allows music instruction to become a meaningful part of the student’s broader education. For homeschool families, online music lessons aren’t simply a convenient alternative to traditional music classes. They can provide access to individualized instruction and specialized areas of music that may not otherwise be available.
For Families Building Their Own Curriculum
Online music lessons for homeschoolers solve a few specific problems traditional classes can’t.
Scheduling around your day, not a school bell. Lessons can slot into a mid-morning break or after a co-op day instead of competing with a fixed class period.
A documented record for portfolios or transcripts. Because lessons happen on video, families can save session recordings, which are useful for annual reviews or high school transcripts that require an arts credit.
No waiting list for a specific instrument or style. Homeschool co-ops and local group classes are often limited to whatever instrument or genre a nearby teacher already offers; online lessons are open to specialized instruction without geographic limits.
One-on-one pacing. A homeschool student who’s ahead or behind grade-level peers isn’t held to the pace of a classroom, online lessons accommodate the student’s speed.
Curious whether online lessons are the right fit for your family or your own learning goals?
Book a free lesson consultation to see how it works firsthand.
Sign up for the free weekly newsletter to receive weekly lessons and exercises.
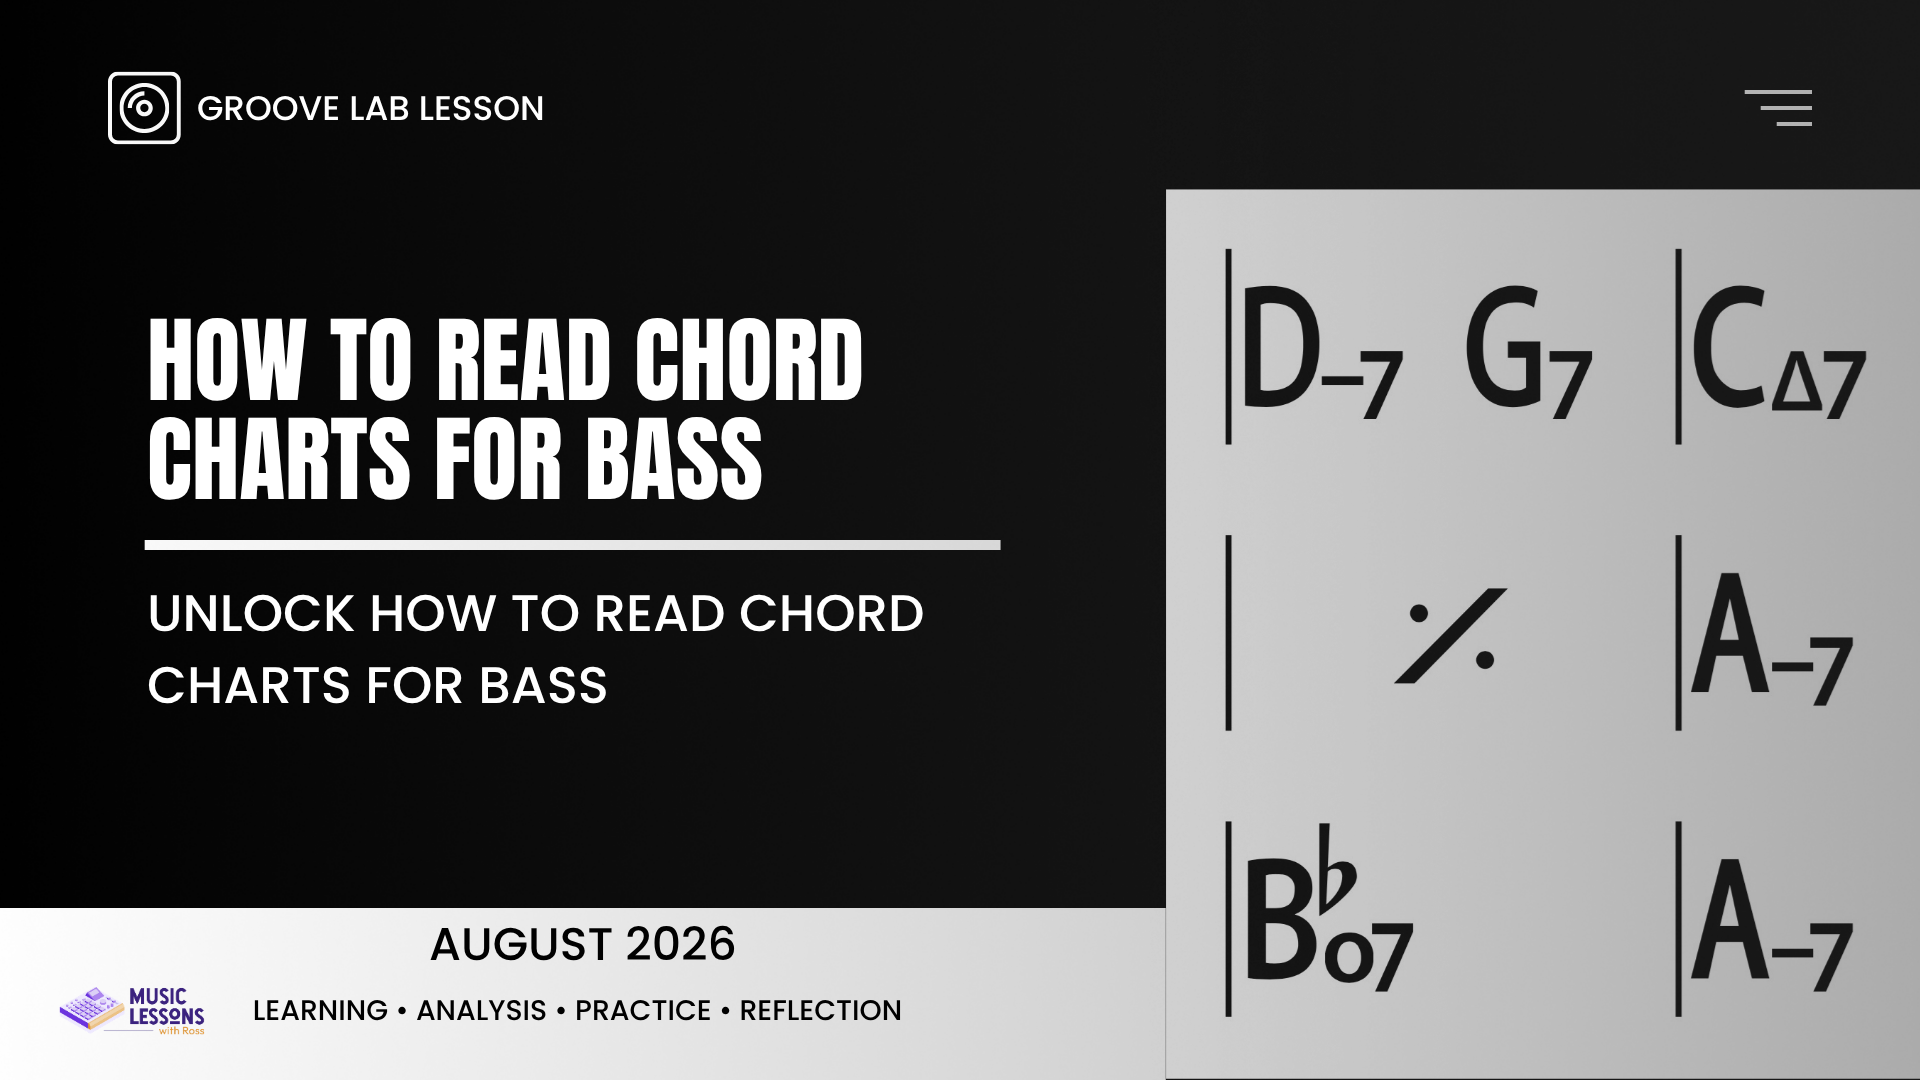
How To Read Chord Charts For Bass
Reading Chord Charts Unlocks Learning Songs On Bass
Most bassists start by learning from tabs, which is a great way to learn songs fast. However, there are situations where tabs aren’t available or for whatever reason a chord chart is the method of learning for a specific song. This can pose a serious challenge for many skilled bassists, because the method for communicating what to play is less direct and requires a different set of knowledge. The goal of this lesson is to teach you what note you should play when you see a chord symbol. So the next time you are faced with a chord chart you know what notes to use to build a bass line over those chords.
In the Groove Lab, we study how chords work, and what notes are in them, so we are prepared to learn a song if no other information is provided. To learn more about different ways to learn songs read the How To Learn Songs On Bass lesson.
Reading a chord cart on bass means turning each chord symbol into the notes of its triad. The Major, Minor, and Diminished triads each follow a fixed pattern of intervals. Once you know the pattern of each triad you can find playable notes for most chord symbols without needing tabs
Defining Chords
It’s likely that even if you don’t know a text book definition of what a chord is, you still have a working understanding of what they are.
Chords are groups of three or more notes that sound good when played together.
They are defined by their root note, and the intervallic distance between each note of the chord.
Chords that have only three notes are defined as triads, and for this lesson that will be our main focus.
Constructing Triads
There are three distinct types of triads that are used in music and represent a majority of what is heard in Western Harmony.
They are major, minor, and diminished.
The pattern for all major chords is, a root, followed by the interval of a major third, or four ½ steps, followed by the interval of a minor third, or three ½ steps.
The pattern for all minor chords is, a root, followed by the interval of a minor third, or three ½ steps, followed by the interval of a major third, or four ½ steps.
The pattern for all diminished chords is, a root followed by the interval of a minor third, or three ½ steps, repeated by another minor third, or three ½ steps.
For further support on playing major and minor thirds on your bass purchase the Interval Micro Worksheet.
Reading Chord Symbols
Chord symbols are short hand for the notes within them, the idea is they quickly communicate what notes to play. The challenge for bassists is, knowing which notes belong in each chord beyond the root note.
Any chord that says major in the name after the letter of the root is built using a major triad, there may be other notes in the chord, but you can always simplify it to the core three notes.
Similarly, any chord that says minor in the name after the letter of the root is built upon a minor triad.
Confusion often sets in with a chord symbol like this, C7 or F13. Those don’t directly say major or minor in their symbol, the way to interpret those is they are built on a major triad. They include other notes, that are important, but can be overlooked for simplicity when first reading or learning a chart.
Another place for confusion is the symbols for diminished chords. Sometimes they are written as DIM, which is short for diminished, other times they are written as a minor flat 5.
Understanding What To Play
When reading chord symbols if you can identify the root and two additional notes in the triad you now know enough to play notes that almost always sound good during that chord.
If that feels a little discouraging because those notes are always “right” but not always “appropriate” that is totally understandable.
The encouraging part is having at least three notes you can use that have a very high probability of sounding great. And in many songs will always sound great.
Remember that context is an important factor, and that in music there are few rules that are always correct, or incorrect. That ambiguity is where the expression is, two players can read the same chart and come up with wildly different ideas to play. Which one is right and which one is wrong is up for the listener to decide.
Experimentation With Notes In A Chord
A useful suggestion for finding the “best” notes for a given chord is to write out the notes of the triads in a systematic way.
For example, Cmaj, C - E - G. This visual guide will help you track the choices you make in a given song.
When coupled with the Groove Lab Rhythm Map, you can write down each note choice you make. Then review later for Voice Leading concerns. For more direction on how to use the notes of a chord in a bass line be sure to read Ethan Hein’s Low End Theory article.
Want More Lessons Like This
This is one piece of the Groove Lab curriculum, that covers Hip Hop groove and Jazz Harmony, designed to teach you how to make better musical decisions. Sign up for the free newsletter and get free weekly lessons and other practice resources.
Put This Into Practice
Chord chart reading and chord analysis are Step Four of Groove Lab Study 3, a free guided study using a Hip Hop and Jazz Fusion backing track. After mapping the drums and writing a bass rhythm that locks in with them, you’ll use this lesson to find the chord tones and choose notes with voice leading. It’s the fastest way to apply this to a real song instead of just a concept.
How To Lock In With Drums On Bass
How to Lock In With Drums on Bass (A Step-by-Step Method)
The most important role of the bass is its role within the rhythm section. Learning how to lock in with drums on bass is a skill every bassist needs to develop, but what does "locking in" actually mean? Locking in with drums means your bass rhythm has a clear, consistent relationship to the kick and snare. It’s not necessarily copying them, but responding to them predictably enough that the two instruments feel like one rhythmic unit. It's not a feeling you chase; it's a relationship you can identify and build on purpose.
Bassists are often told to "listen to the drummer" or "feel the pocket." That advice isn't wrong, but it doesn't give you a method for actually developing the skill.
Successful growth starts with understanding, never guessing, what the drums are doing.
In this lesson, you'll learn a system for mapping the kick and snare pattern of a song on a visual rhythmic grid. By making the underlying drum pattern visible, you can identify where the bass and drums align, where they diverge, and how those relationships shape the groove.
Instead of simply trying to "feel" the pocket, you'll learn to see the rhythmic structure you're playing against and make informed decisions about your own bass line.
Locking in with drums on bass means your bass rhythm has a clear, deliberate relationship to the kick and snare. Each note responds consistently, without copying the drums, so the rhythm section is heard and felt as one unit. To build that relationship, start by mapping the kick/snare pattern visually, then choose the bass rhythm that supports it.
The Groove Lab Rhythm Map
The Groove Lab Rhythm Map is a simple system for writing down what the kick and snare are playing, so you can see the pattern instead of just trying to feel it.
Step 1: Build Your Rhythmic Grid
Choose a mapping system, either the Rhythm Yard Stick, or the 1e+a grid.
Use whatever is easiest to read and use, just as long as the 16th note subdivisions are represented.
To better understand the drums, we need to map or write down, in an easy-to-read and consistent way, what they are playing. There are multiple techniques you can use to visualize this “map” of the drum pattern. One is the Rhythm Yard Stick, created by Victor Wooten and Anthony Wellington, this is where I first learned the idea of mapping subdivisions this way. The idea is you write down every 16th-note subdivision of a measure of music on a line, similar to a ruler.
Another method is using a 1e+a 2e+a 3e+a 4e+a rhythmic grid, again written down on either paper or a whiteboard. There are multiple ways to represent the 16th-note subdivisions of a measure that don’t require staff notation. Which you use is up to personal preference. The goal is to have an easy-to-read and write system for identifying the kick and snare hits in a drum pattern.
Step 2: Listen For The Pulse
Play the song listening for the pulse, be sure to count and connect your body, while tuning out the other instruments.
Rewind and listen as many times as necessary, the results improve with time and repetition.
Once you have a rhythmic grid outlined, next you need to listen to the music, but keep your focus on the overall pulse while counting and moving your body with the music. This sounds easy, but beginners often notice they are distracted by the other instruments as they listen. If this happens to you, don’t panic. You can rewind and listen as many times as needed.
Step 3: Map The Kicks & Snares
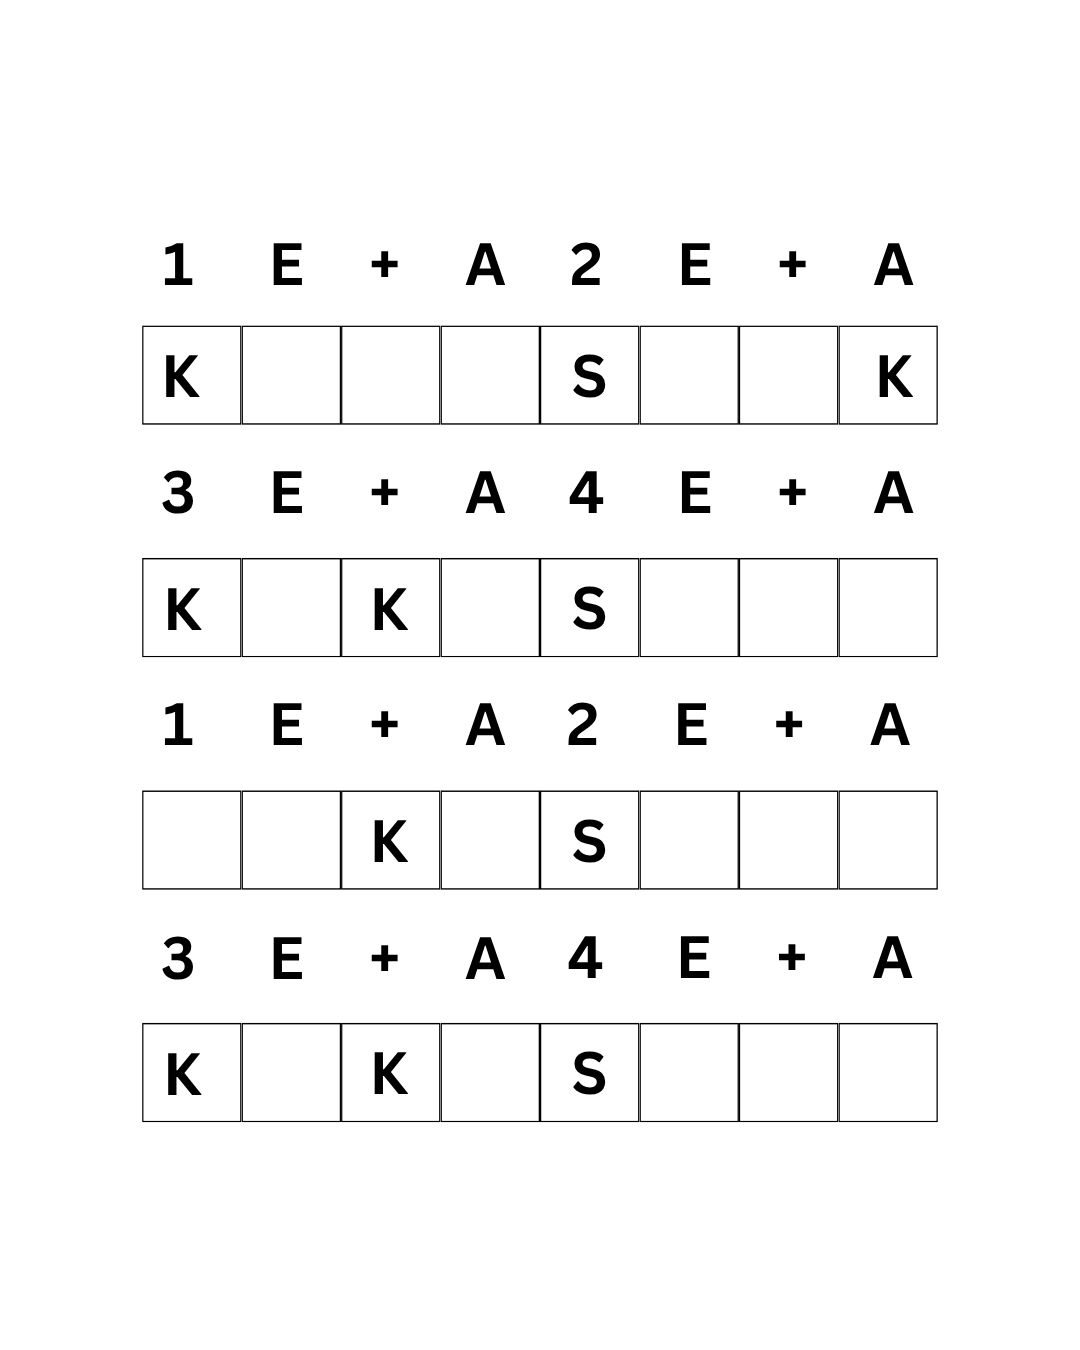
Mark “K” for kicks, and “S” for snares onto the grid as you identify them.
Perfection isn’t necessary, an approximate map that is easy to see and read is better than one you are still trying to hear.
As you become comfortable focusing your listening on the rhythm and drums of a song, you can proceed to the next concept. You may have already noticed where certain kick and snare hits land if the pattern is simple, or you are already familiar with the song. If that’s the case, start filling in your map with “K’s” for kicks and “S’s” for snares. If you are struggling, don’t feel like you need to get it all right or even finish it on the first attempt or even day of practicing this. The idea is to treat it as a practice; the more often you do this, the easier it becomes.
Step 4: Analyze The Pattern
Once You’ve map is filled in, identify any noticeable patterns in the drum parts.
After several listens, or if you’re confident it’s finished and accurate, take a look at the drum pattern visually and ask yourself the following questions.
“Are there any patterns or motifs used?”
“Where does the kick always/never land?”
“Where does the snare always/never land?”
Example From Groove Lab Study 1
Below is an example of what a filled out Rhythm Map looks like, the example maps the drum pattern from Groove Lab Study 1.
Step 5: Add Your Bass Rhythm
Support the kick’s on strong beats with staccato notes.
Play around, not on top of, the snare hits.
Experiment then evaluate, what relationships do the bass and drum rhythms have.
Now that you have a map of the drum’s rhythm, and you’ve started to analyze it, you’re ready to think about how to add a bass line that locks in with the drums. The goal should be to complement the drum pattern without simply copying it, but instead think about the spaces left and how to fill them.
Often, drum grooves fall into patterns. This is necessary to hold the song together. But too little variety is likely to lose energy over time. By filling in empty spaces, the bass can create interest and excitement without diluting the impact of the other instruments.
One example of this is, if the snare hits in the same place each measure, think about playing around those beats either before, after, or both to create contrast and motion.
At the same time, the goal isn’t to avoid playing at the same time as the drums entirely. There are so-called “strong” or emphasized beats that the bass often should support with the kick drum. In those cases, using short duration, or staccato phrasing, allows the bass to add pitch to the beat of the kick drum.
A natural starting place is to copy the kick drum’s strong beats with short notes, while playing around the snare hits with more legato phrasing. Experimentation is encouraged, and when you find something pleasing, ask: What relationship does my bass rhythm have with the drums?
This approach yields more consistent results than trying to follow any pre-set pattern.
Translating Ideas Into Grooves
The Rhythm Map method assumes some foundational skills and vocabulary, use the following resources to review or fill in any gaps.
Groove Vocabulary, or the language bassists use to define and describe pocket and groove.
Groove Theory, the concepts used in every bass line that include space, repetition, and note duration.
Time and Internal Pulse, the defining ideas and supporting drills that train the basics of rhythmic literacy and execution.
Groove Lab As A System
Those principles and skills are at the center of what we study in the Groove Lab. The belief is, that through definition and training groove is a skill that can be improved, not an innate ability you either have or don’t.
If you’re ready to start improving your groove, and become the best bassist you can be, sign up for a free consultation/diagnostic meeting. That will help evaluate where you are and see if private lessons are a good fit for your bass journey.
Put This Into Practice
The Rhythm Map you just learned is Step One of Groove Lab Study 3, a free guided study using a Hip Hop and Jazz Fusion backing track. In the study you’ll map the drums, and use that to write a bass rhythm that locks in with the drums, before moving on to chord analysis and voice leading. It’s the fastest way to apply this method to a real song instead of jut a concept.
How To Practice Bass: The Groove Lab Practice Cycle
Most students believe improving on their instrument comes down to one of two things: the number of hours they practice or the difficulty of the material they work on.
The logic usually sounds something like:
"If I put enough hours into this exercise, I'll get better."
Or:
"If I can play this difficult technique or complicated song, I'll become a great musician."
There's truth in both ideas. Consistent practice is essential, and challenging material can push us to grow. But neither guarantees improvement on its own.
The missing piece is how you practice.
Improvement doesn't come from repetition alone. It comes from creating a feedback loop: playing, observing, reflecting, identifying problems, experimenting with solutions, and evaluating the results. Without that process, it's easy to spend hours practicing while reinforcing the very habits you're trying to change.
During a lesson, a teacher naturally provides that feedback. They identify problems, explain why they're happening, suggest new approaches, and adjust the practice plan as you improve. But when students practice on their own, that guidance often disappears. Many simply repeat exercises without knowing what they're listening for, what needs to change, or how to solve the problems they encounter.
The purpose of this lesson is to help you build that missing framework.
You'll learn a repeatable practice process that helps you think more like your own teacher—one that uses recording, observation, reflection, and experimentation to turn every practice session into an opportunity for meaningful improvement.
Because what you practice matters.
But how you practice determines what you become.
This process is the foundation of everything I teach through Groove Lab, here's how it works.
The Groove Lab Practice Cycle
To improve you need to identify what isn’t working, whether that’s timing, technique, physical mechanics, etc. Identification problems while playing is a skill that comes with mastery, fortunately there are more accessible ways to identify problems in your bass playing.
Step 1 — Record
Choose one exercise, groove, or musical phrase you're currently practicing and record yourself playing for at least one minute.
Don't worry about perfection. Your goal is to capture an honest performance that you can evaluate objectively.
Step 2 — Observe
Watch the recording without your instrument.
Write down every inconsistency you notice, no matter how small.
Examples:
Uneven rhythm
Missed notes
Unwanted string noise
Rushing or dragging
Inconsistent articulation
Weak dynamics
Awkward movement
If timing-related issues show up on your list — rushing, dragging, or inconsistent subdivision — this lesson on building internal pulse can help you design a more targeted Step 6 exercise.
Think like a scientist collecting observations rather than a critic looking for mistakes.
Step 3 — Analyze
Choose one observation and describe it as specifically as possible.
Ask questions like:
What happened?
Where did it happen?
When does it occur?
How often does it happen?
Why might it be happening?
The more accurately you can describe the problem, the easier it becomes to solve.
Having the right vocabulary makes this step easier. If you're not sure how to name what you're hearing, Groove Vocabulary for Bass Players breaks down the specific language of pulse, subdivision, placement, and feel.
Step 4 — Define Success
Now describe what the correct performance should look and sound like.
Instead of focusing on the mistake, clearly define the outcome you're trying to achieve.
For example:
Every eighth note should line up with the subdivision.
Muted notes should remain short and controlled.
The articulation should stay consistent throughout the phrase.
Step 5 — Experiment
Compare your current performance with your desired outcome.
Ask yourself:
What's different?
Then brainstorm one small change that might move your playing closer to the goal.
Step 6 — Design an Exercise
Create the simplest possible exercise that isolates the problem.
The exercise should remove unnecessary complexity so you can repeat the correct movement many times with intention.
If the problem involves one beat, practice one beat.
If it involves one shift, practice one shift.
Keep the solution as small as possible.
Step 7 — Test
Record yourself performing the new exercise.
Don't assume it worked.
Collect new evidence.
Step 8 — Reflect
Watch the recording and ask:
Did the problem improve?
What changed?
What still needs work?
What surprised me?
Use your observations to adjust the exercise if necessary.
Step 9 — Apply
Return to the original groove, exercise, or musical phrase.
Record it again and compare it to your first performance.
Notice what improved, what still needs attention, and repeat the cycle whenever you encounter a new challenge.
This same cycle of observation, experimentation, and reflection is exactly how I approached Selective Picking on Bass: Technique Becomes Vocabulary — applying it not just to a single technical problem, but to an entire original composition.
Try It Yourself
Choose one exercise, groove, or musical phrase you've been struggling with and commit to using the Groove Lab Practice Cycle for one week.
Record your progress, write down your observations, and reflect on the adjustments you make each day. Don't just document what improved, instead document how you identified the problem and why you chose the solution you practiced.
At the end of the week, compare your first recording with your last. What changed? What surprised you? What questions do you still have?
I'd love to see your process.
Email your recordings, journal entries, or reflections to Ross@musiclessonswithross.com, or share your practice journey on social media and tag me. I'll provide feedback not only on your playing, but on your problem-solving process.
TikTok: @bassmanross
Instagram: @musiclessonswithross
Facebook: @musiclessonswithross
YouTube: @musiclessonswithross
Twitter: @BassTeacherRoss
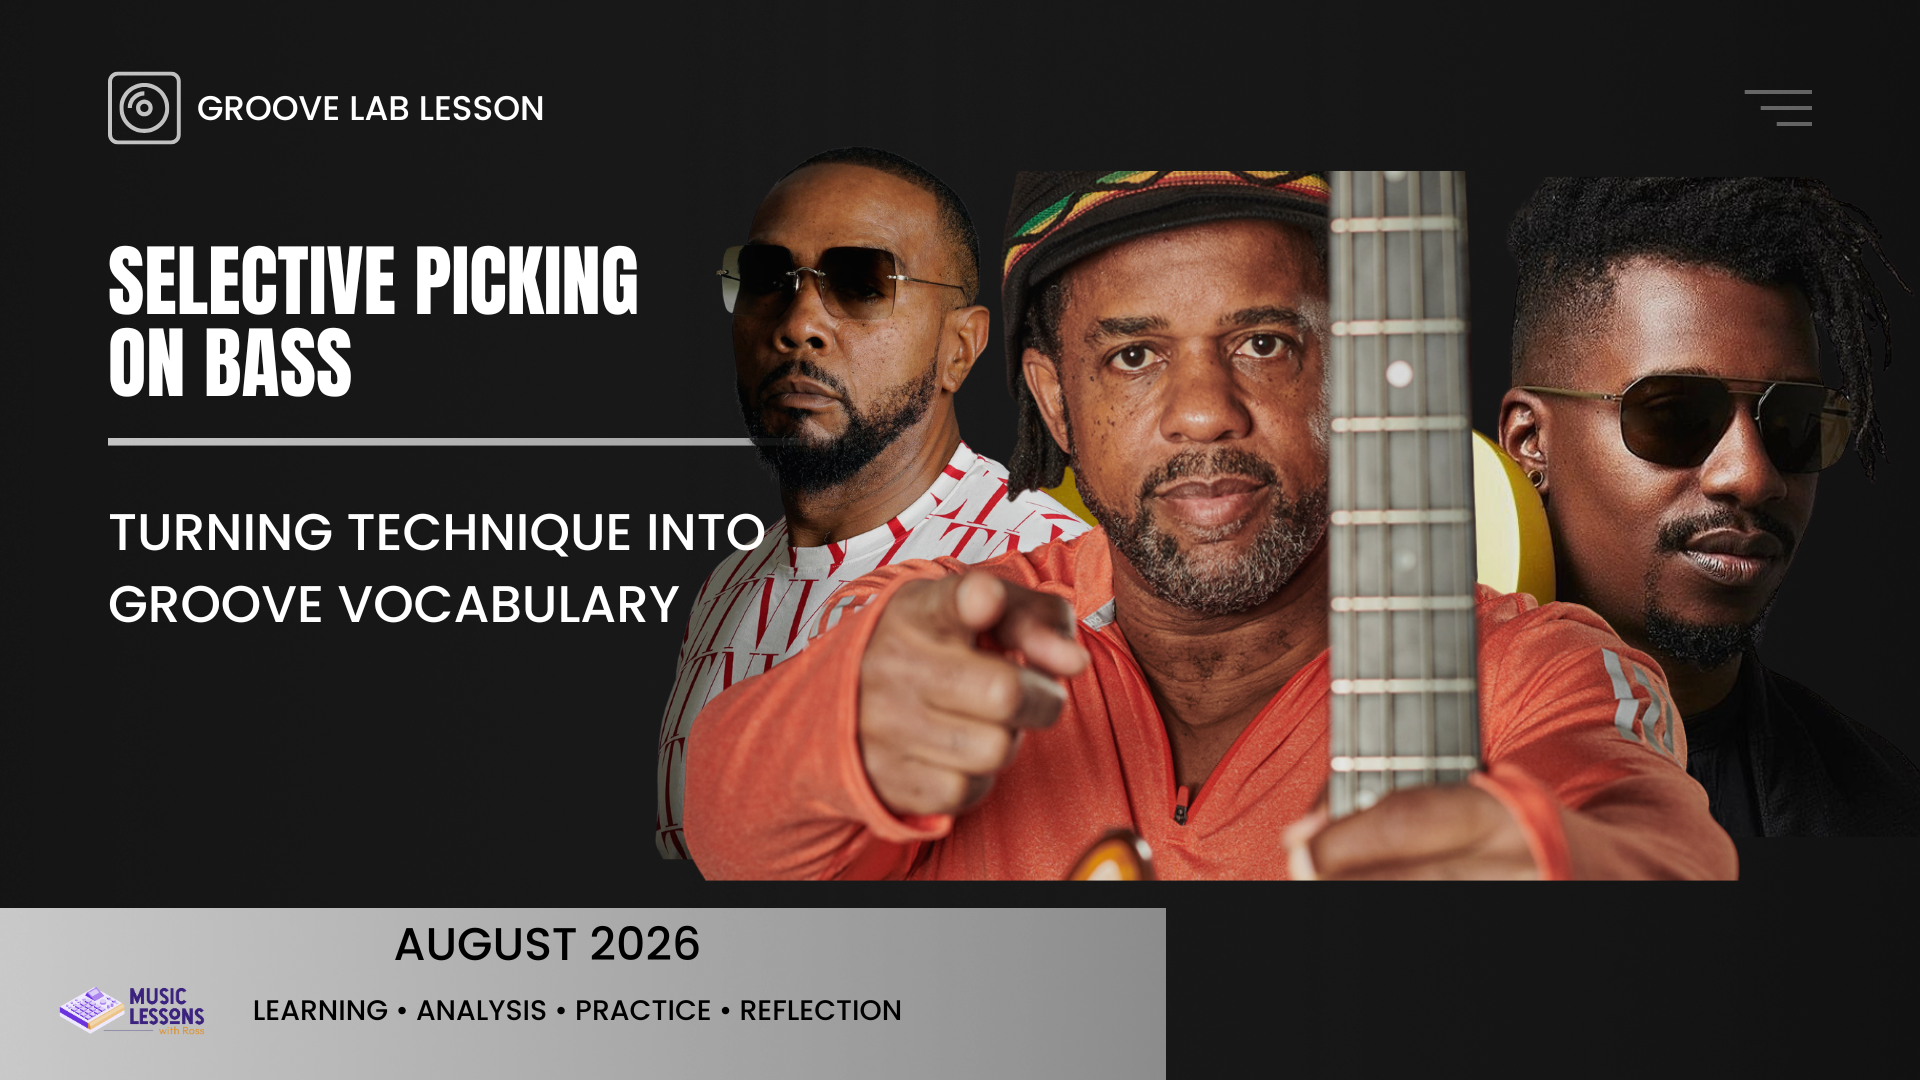
Selective Picking on Bass: Turning Technique Into Groove Vocabulary
Creative Spark
While watching Tosin Abasi demonstrate selective picking, I noticed something that had very little to do with progressive metal.
The technique wasn't interesting because it was fast.
It was interesting because it changed the articulation of individual notes.
That observation reminded me of Victor Wooten's double-thumb technique, where alternating attacks create contrast and rhythmic clarity.
I then wondered what would happen if those same articulation ideas were placed over a sparse Timbaland-inspired Hip Hop groove.
This study documents that experiment.
Contribution to the Groove Lab Framework
This study expands Groove Lab's understanding of articulation by demonstrating that technique is more than physical execution.
Articulation can be used to create contrast between rhythmic voices, emphasize groove, and influence how listeners perceive motion within a bass line.
Future Groove Lab Studies will continue exploring how individual musical decisions combine to shape feel, harmony, and composition.
Articulation is one part of a larger groove vocabulary that bass players can develop, learn more in the Groove Vocabulary for Bass Players lesson
Selective Picking Bass Riff Breakdown
Behind the Tone: The Abasi Concepts Micro-Aggressor
The compression on this recording comes from the Abasi Concepts Micro-Aggressor, a pedal designed by Tosin Abasi and Abasi Concepts. Running the bass through it helped shape the attack and sustain on the picked notes, giving the faster passages more clarity and evenness without flattening out the dynamics of the performance.
Inspiration: Turning Selective Picking Into Bass Groove Vocabulary
Selective Picking is a technique created by Tosin Abasi that “Mixes percussive hammer-ons from nowhere with picked notes to create rapid, syncopated, drum-like rhythms and interesting timbres that cannot be easily achieved with standard alternate picking or pure legato.”
The rhythmic options and versatility of timbres immediately got me inspired and thinking about how to use this technique in a composition on a bass. The pattern I quickly gravitated to was.
Downstroke thumb on an open string
Hammer-on from nowhere to a fretted note
Upstroke thumb on the same fretted note
Index finger pluck on the neighboring higher string
Middle finger pluck on the next neighboring string
The five-note grouping created a quintuplet-like feel against the quarter note pulse, producing a rolling rhythm that moved independently from the traditional four-note subdivisions most bassists practice.
The combination created a phrase that felt halfway between a bass line and a percussion pattern. The attack of the thumb created a kick-like emphasis, while the hammer-ons and finger plucks filled the space like a drum pattern.
This was really exciting and started to remind me of material by Victor Wooten, specifically “Classical Thump”, where technique becomes a way of creating rhythmic and melodic possibilities rather than simply demonstrating speed.
This type of exploration is central to Groove Lab: techniques become valuable when they expand your ability to make intentional musical decisions.
Almost immediately, I began thinking about what type of drum groove would complement this texture. Because the pattern had a rolling, percussive quality, I wanted something with minimalist bounce and space. That search led me toward the production style of Timbaland.
From Inspiration to Composition
Building Drum Patterns Around Bass Lines
After developing the bass part, I started building the drum groove around it. The selective picking patterns created dense textures, quintuple phrasing, and frequent rhythmic movement. Rather than matching that complexity, I wanted the drums to provide balance through space, bounce, and a strong sense of groove. My goal wasn't to write a drum beat that copied the bass rhythms, but one that enhanced their character.
This relationship between bass and drums is one of the most important aspects of groove. Together they should create a single musical idea, not compete for attention.
To learn more about the relationship between drums and bass in creating groove, visit the Hip Hop Groove Theory lesson.
You've probably heard the advice, "Follow the kick drum." It's good advice, but it's often misunderstood.
Many bassists interpret it as copy whatever the kick plays. In practice, that can cause the bass and kick to fight for the same rhythmic and sonic space.
A better way to think about it is conversationally. When the kick drum speaks, the bass can support it, answer it, or leave space for it. Groove comes from that interaction, not constant unison.
The same principle applies to the snare drum.
Because the snare often defines the backbeat, the bassist can create momentum by deciding when to reinforce that pulse and when to play around it. Sometimes the strongest note in a phrase is the one you choose not to play.
Most of the time, bassists are writing parts after a drum groove already exists. In those situations, the bass becomes the glue between the rhythm section and the harmony.
This composition presented the opposite challenge.
The bass line came first, so I needed to design a drum groove that supported the existing rhythms without competing with them rhythmically or sonically.
That naturally led me toward Timbaland's production style.
Rather than copying specific drum patterns, I studied the qualities that make his grooves feel alive: intentional use of space, unexpected syncopation, layered percussion, and drums that converse with the other instruments instead of simply marking the beat.
Arrangement as a Compositional Tool
With the drums and bass recorded into Ableton Live, the next challenge was creating melodic contrast. I wrote a melody for six-string guitar that, as my wife described it, "floated" over the dense rhythmic foundation.
While developing the arrangement, I kept thinking about a production technique common in hip hop: dropping the drums out at the beginning of a phrase to create anticipation before they return.
That idea sparked another. Instead of leaving the space empty, what if the bass used the Selective Picking technique to introduce a new melody while the guitar doubled it in unison?
One lesson became clear: arrangement isn't just deciding what instruments play. It's deciding when they play, when they stop, and how changing the texture changes the listener's perception of the groove.
By dropping the drums, and having the bass and guitar play the melody in unison I was able to create intentional variation and a sense of narrative development that felt like a continuation of an idea.
Articulation as a Compositional Tool
One of the easiest ways to make a composition feel larger isn't adding more notes, it's changing the articulation. Instead of trying to add complexity or intensity, I did the opposite. Rather than increasing intensity, I removed nearly everything. The instruments disappeared, replaced only by an atmospheric wind sample that acted like a musical reset before the next section began. When the bass and drums return I had a new technique borrowed straight from my studies of Victor Wooten.
Two hand tapping is a technique commonly associated with guitarists, but many bassists use it also. I wasn't using two-hand tapping because it was flashy. I chose it because its attack and sustain created a completely different articulation than the Selective Picking section that came before it.
During Victor Wooten's Music & Nature Camp, Victor demonstrated a two-hand tapping approach that felt closer to piano phrasing than the aggressive tapping styles often associated with players like Les Claypool or John Ferrara. That sound stayed with me, and eventually found its way into this composition.
The compositional objective wasn't to impress the listener with another technique. It was to change the character of the music. Different articulation changes how the same instrument communicates emotion.
As the bass part, and groove changed, I also programmed a new drum beat with more motion and swing to balance the potential lack of energy or motion in this section.
These diverse elements unfolded like an equation.
Desire to create interest by writing a more relaxed section. That section required a different articulation and technique from the bass. That in turn required the drum pattern to shift and evolve as well.
One compositional decision rarely exists in isolation. Changing the bass articulation affected the groove. That required a new drum feel. The new drum feel changed the energy of the arrangement. Every musical choice created another decision.
Looking back, the piece feels carefully designed. During the writing process, however, it was mostly experimentation. Experience simply gave me enough vocabulary to recognize which ideas were worth keeping.
One of the biggest misconceptions about composition is that creativity comes from inspiration alone. In reality, creativity often comes from having a large enough musical vocabulary to solve compositional problems. Every technique you study becomes another option when your music needs contrast, tension, release, or momentum.
Arrangement Study & Practice
Reading about compositional decisions is only the first step. The real learning happens when you perform the arrangement, analyze why each section changes, and experiment with those same ideas in your own music.
Download the Groove Lab Study 2 arrangement and study guide to explore the Selective Picking technique, identify the arrangement decisions throughout the piece, and practice applying these concepts to your own compositions.
Why Bass Players Struggle to Play Memorable Solos
When the bass stops supporting the music and becomes the melody, your decision-making framework must change.
You've played several songs. The groove feels solid. The band is locked in. Then someone points at you and says, "Take one."
This is where many bassists freeze, not because they don’t know enough scales, not because they aren’t skilled players. The reason most bassists struggle to play memorable solos is because they're trying to solve a melodic problem using the same mindset that creates a great groove.
Those are not the same skill.
A memorable bass line is designed to support the music. A memorable solo is designed to become the music.
That shift changes everything.
Instead of thinking about pocket, consistency, and supporting the band, your attention turns toward phrasing, emotional direction, dynamics, and creating ideas listeners can remember.
The good news is that memorable solos rarely depend on blazing speed, complex harmony, or flashy technique. They depend on communicating a musical idea.
If someone leaves the performance humming a phrase you played, you've accomplished something far more meaningful than impressing them with a hundred notes.
So how do bassists develop the skills to think melodically?
The answer isn't learning more scales.
It's learning to listen to, analyze, and play great melodies.
Download the Free Melody Analysis Study
Instead of just reading about melody analysis, apply the process yourself.
This free study includes:
A bass arrangement of Somewhere Over the Rainbow
Harmonic analysis
A transposition exercise
Guided reflection
A musical decision framework
Download the Memorable Melody Study
What Makes A Melody Memorable
Great melodies aren't memorable because they're difficult.
They're memorable because they communicate clearly.
The next time you learn a melody, don't simply ask "What notes are they playing?"
Ask the following questions instead.
Is It Singable?
A memorable melody stays with you long after the performance ends.
Can you hum it minutes later?
Hours later?
A memorable melody doesn't have to be simple, but it should feel inevitable. Each phrase should sound like it naturally leads to the next.
Ask yourself:
Can I sing this phrase without my instrument?
What makes this melody easy to remember?
Does It Breathe?
Great melodies leave room for listeners to absorb an idea before introducing the next one.
Silence isn't the absence of melody—it's part of the phrase.
Singers and horn players naturally think this way because they have to breathe. Bass players often forget that melodies need the same sense of space.
Ask yourself:
Where does this melody pause?
Which notes are emphasized?
Which notes intentionally receive less attention?
Does It Develop?
Many beginning improvisers introduce new ideas continuously.
Memorable melodies often do the opposite.
They establish one idea, repeat it, vary it, expand it, and eventually resolve it.
Listeners remember development more than constant novelty.
Ask yourself:
What is the main idea?
How does it change throughout the phrase?
Where does repetition create familiarity?
Does It Have Direction?
Melodies rarely wander aimlessly.
They move somewhere.
Sometimes through pitch.
Sometimes through rhythm.
Sometimes through harmony.
Direction creates anticipation and gives the listener a reason to keep following the musical story.
Ask yourself:
Where is this phrase trying to go?
How is tension created?
Where is that tension released?
Does It Have Shape?
Emotion often comes from contrast rather than complexity.
Changes in dynamics, register, rhythm, density, and space help shape how a melody feels.
Without contrast, even technically impressive solos can become difficult to remember.
Ask yourself:
Where does the melody become louder or softer?
Where does it become more active or more spacious?
How do those changes affect the emotional impact?
How Does It Interact with the Harmony?
Melodies don't exist in isolation.
Every note creates a relationship with the harmony underneath it.
Some notes create stability.
Others create tension.
Some resolve immediately.
Others intentionally delay resolution.
Understanding those relationships gives you more expressive choices when creating your own melodies.
Ask yourself:
Which notes feel stable?
Which notes create tension?
Why do those moments feel satisfying?
Melody Analysis as Practice
One of the fastest ways to become a more melodic soloist isn't learning more solos, it's learning to analyze great melodies.
Let's use Somewhere Over the Rainbow as a case study.
I chose this melody for two reasons. First, it's one of the most recognizable melodies ever written. Second, despite its emotional depth, it isn't technically difficult to play. That allows us to focus on the musical decisions instead of the mechanics.
Step 1: Learn the Melody
Learn the melody until you can play it comfortably from memory with a metronome or drum track.
Your goal isn't simply to memorize the notes. It's to internalize the phrasing, rhythm, and emotional shape of the melody.
Step 2: Analyze the Melody
Now begin asking questions.
What scale degree is every note?
Which notes feel stable?
Which notes create tension?
Where does the melody leap, and where does it move stepwise?
By identifying how each note relates to the harmony, you begin understanding why the melody sounds the way it does.
Step 3: Transpose the Melody
Move the entire melody to a new key, such as G major.
The intervals remain the same, but your understanding becomes independent of a single position or fingering.
Rather than memorizing shapes, you're learning the language of the melody.
Step 4: Explore Variations
Once you understand the original melody, begin experimenting.
Add approach notes.
Insert chromatic passing tones.
Change the rhythm while preserving the melodic identity.
The goal isn't to improve the original melody—it's to understand how small musical decisions create entirely different emotional results.
If you'd like to work through this process step by step, download the accompanying Groove Lab Study Guide, where we'll analyze the melody, transpose it, and develop original variations together.
Where To Go Next
Learning a memorable solo isn't about collecting more licks, more technique, or even being the “best” musician in the room.
It's about understanding why a melody is memorable so you can recognize those ideas in other songs, and learn to use them yourself.
If you completed the melody analysis, you've practiced thinking beyond note names by identifying melodic function, transposing ideas, and making intentional musical decisions.
That's the same process professional musicians use to learn, adapt, and develop musical ideas.
Continue Learning
This melody analysis is one lesson within the larger Groove Lab curriculum, where rhythm, harmony, and melody are studied as connected musical decisions rather than isolated techniques.
If you're ready to build your own memorable bass lines and solos, explore the complete Groove Lab Studies for original compositions, guided analyses, and practice worksheets designed to develop your musical vocabulary.
If you'd like personalized feedback on your playing, analysis, or original ideas, I'd love to work with you.
Schedule a one-on-one lesson consultation and let's continue developing your musical voice.
How to Learn Songs on Bass: Why Great Musicians Use More Than One Method
What's the best way to learn songs on bass? Should you use bass tabs, tutorials, chord charts, or learn by ear?
I recently asked over 100 bassists that exact question on TikTok. I expected one learning method to clearly stand above the rest.
Instead, the responses revealed something much more interesting.
Many of the most experienced musicians didn't choose a single method at all. They described combining tabs, ear training, tutorials, and chord charts depending on the musical skill they were trying to develop.
That shifted the question entirely. The real issue isn't Which learning method is best? It's Which learning method is best for the skill you're trying to build?
The more I mature as a musician, composer, and educator, the more convinced I become that every notation system is an incomplete representation of music. Tabs, tutorials, chord charts, and ear training each reveal a different part of the picture. Great musicians learn to combine those perspectives—and eventually move beyond simply recreating music toward understanding the musical decisions behind it.
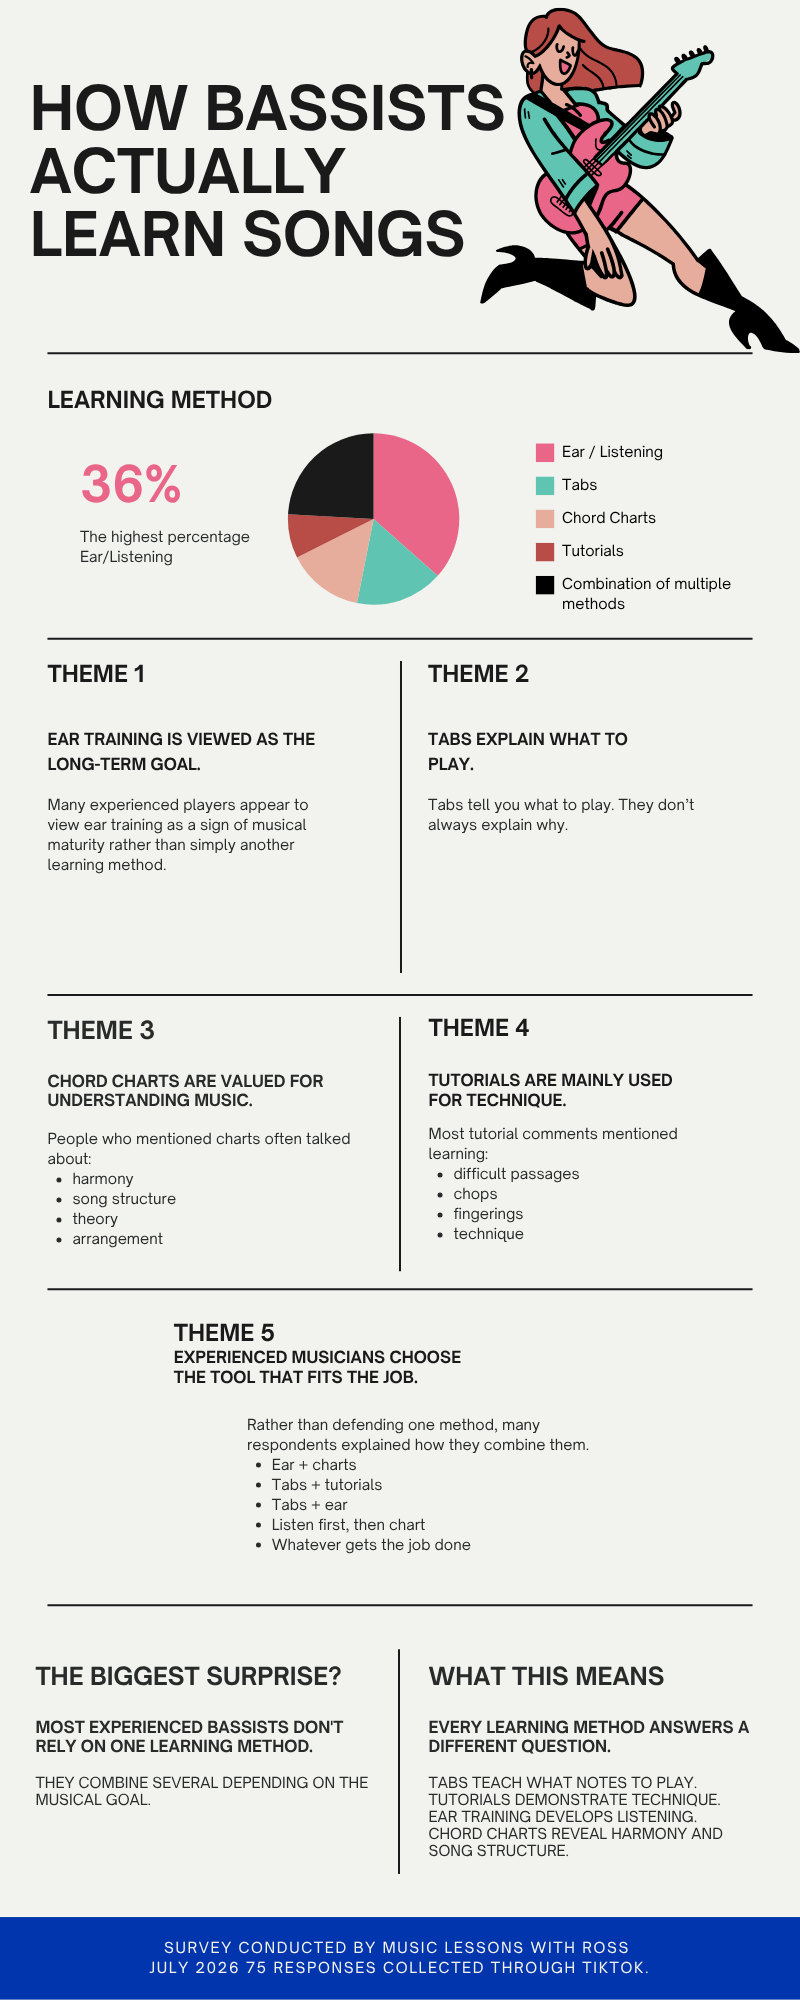
The Four Ways Bassists Learn Songs
1. Bass Tabs
Bass tabs are often the first notation system players encounter, and for good reason. They make learning songs approachable by showing exactly where to place your fingers on the instrument. For beginners especially, tabs remove much of the mystery surrounding the fretboard and make it possible to start playing recognizable music quickly.
Tabs are particularly effective for learning note selection and fretboard navigation. If your goal is to memorize a bass line or build technical vocabulary, they're one of the fastest and most accessible tools available.
Like every learning method, however, tabs communicate some types of information better than others.
Most tabs place little emphasis on rhythm, harmony, or the musical reasoning behind a bass line. While they tell you whatnotes to play, they rarely explain why those notes were chosen, how they relate to the underlying harmony, or how they should feel rhythmically within the groove.
Because of this, many players become comfortable reproducing bass lines without fully understanding how those lines function in the music. They may know where to put their fingers, but struggle to recreate the groove, adapt the idea to another song, or write something similar themselves.
Tabs are an excellent tool for building musical vocabulary.
But vocabulary alone doesn't create musicianship.
To become a complete musician, tabs are most effective when paired with listening, rhythmic understanding, and harmonic analysis.
If you're ready to move beyond memorizing notes and begin understanding why bass lines work, explore Groove Vocabulary for Bass Players, where we break down the musical concepts behind groove, pocket, placement, and feel.
2. Tutorials
Video tutorials have become one of the most accessible ways to learn bass. YouTube and social media are filled with performers and educators demonstrating everything from famous bass lines to advanced techniques, making it easier than ever to watch experienced musicians solve musical problems in real time.
Tutorials are particularly valuable for learning technique, body mechanics, and physical execution. Seeing how a player positions their hands, attacks the strings, or shifts across the fretboard can communicate details that written notation simply cannot. For many bassists, this visual feedback can save hours of frustration and accelerate technical development.
Technical control only becomes musical when it serves the groove. Continue with 3 Bass Technique Exercises That Instantly Improve Your Groove to develop consistent articulation, dynamics, and control.
Like every learning method, however, tutorials emphasize certain types of learning more than others.
Many tutorials focus on what to play and how to play it, but spend less time exploring why those musical choices work. It's common to learn a riff accurately without discussing how the groove supports the drums, why certain notes were chosen over others, or how the idea could be adapted in a different musical context.
Tutorials are excellent for developing technical confidence and observing experienced musicians.
They become even more valuable when paired with analysis that explains the musical decisions behind the performance.
3. Chord Charts
Chord charts provide a different type of information than tabs or tutorials. Rather than prescribing exactly what to play, they outline the harmonic framework of a song and leave the performer responsible for creating their own part.
Because chord charts are useful for every instrument, they're widely available and often easier to find than instrument-specific transcriptions. They encourage experimentation, improvisation, and personal interpretation instead of memorizing a single "correct" bass line.
For bass players, chord charts are especially valuable because they develop harmonic awareness. Instead of asking, "What notes did someone else play?" the question becomes, "What notes best support this harmony?" That shift moves the player from reproducing music toward creating it.
The tradeoff is that chord charts assume a greater understanding of harmony. Players who are unfamiliar with scales, chord tones, voice leading, or harmonic function may find them intimidating at first. They also provide very little information about rhythm, groove, articulation, or note placement, leaving those decisions entirely to the performer.
Chord charts are one of the strongest tools for developing musical independence.
To make chord charts more useful, develop your understanding of harmonic function and smooth bass line construction in Voice Leading: How to Create Smooth Transitions Between Chords on Bass.
They become most effective when paired with listening, rhythmic analysis, and a solid understanding of harmonic relationships.
4. Learning By Ear
Learning music by ear is one of the oldest traditions in music. Long before notation systems existed, musicians learned by listening, imitating, and responding to one another. While modern technology has given us countless ways to learn songs, developing your ear remains one of the most valuable skills a musician can build.
Learning by ear develops something the other methods cannot: active listening. Instead of relying on written instructions, you're training yourself to recognize rhythm, harmony, melody, articulation, and feel directly from the music. Over time, this strengthens your musical intuition and builds confidence in your ability to solve musical problems independently.
Learning by ear also changes your relationship with music. Listening becomes an active process of asking questions, identifying patterns, and making musical decisions rather than simply consuming what you hear.
Like every learning method, however, it comes with challenges.
Learning by ear can feel slow and frustrating, especially for players who are accustomed to having every note written out. It requires patience, repetition, and realistic expectations. Even experienced musicians regularly slow recordings down, isolate difficult passages, and revisit phrases multiple times before they feel confident in what they're hearing.
Rather than viewing these challenges as signs of failure, think of them as part of the training process. Every phrase you learn by ear strengthens the listening skills that support improvisation, composition, ensemble playing, and musical independence.
Learning by ear becomes much easier when you know what to listen for. Groove Vocabulary for Bass Players provides a framework for identifying pulse, subdivision, placement, note duration, dynamics, and space while listening.
Learning by ear doesn't replace tabs, tutorials, or chord charts.
It helps you become less dependent on them.
Becoming Your Own Musical Detective
After asking more than 100 bassists how they prefer to learn songs, I expected to discover one method that clearly stood above the rest.
Instead, I found something much more valuable.
Every learning method answers different musical questions.
Tabs answer where to play.
Tutorials demonstrate how to move.
Chord charts explain what harmony you're supporting.
Learning by ear develops how you listen.
None of them tell the entire story.
Every resource is a snapshot of the music.
Groove Lab is built around this idea. Every lesson, study, and worksheet explores the same piece of music from multiple perspectives so you gradually learn to connect the information yourself.
Each captures one perspective while leaving other parts for the musician to discover.
A tab may accurately show every note while saying very little about harmony or feel.
A chord chart explains harmonic movement but leaves rhythmic phrasing and articulation open to interpretation.
A tutorial reveals the physical mechanics of a technique but may spend little time discussing why those musical choices work.
Even learning by ear has limitations. What you hear is shaped by your current technical ability, harmonic understanding, and listening experience.
As musicians grow, something interesting begins to happen.
Instead of expecting every resource to provide every answer, they begin filling in the missing information themselves.
They hear the groove behind the tab.
They recognize harmonic movement hidden within the chord chart.
They understand the musical purpose behind a technique demonstrated in a tutorial.
They use their ear to verify, question, and refine what every other resource suggests.
That is where musicianship begins.
The goal isn't to find the one perfect learning method.
The goal is to develop enough listening, technical, and harmonic understanding that every resource becomes more valuable than it was before.
A beginner reading a chord chart and an experienced musician reading the exact same chart aren't seeing the same thing.
The information hasn't changed.
The musician has.
Great musicians become musical detectives.
When they encounter an unfamiliar groove, technique, or harmonic idea, they don't ask,
"What's the correct way to learn this?"
Instead they ask,
"What information is this resource giving me, and what do I need to discover for myself?"
That question changes everything.
Rather than depending on one method, they combine listening, analysis, experimentation, and experience until the complete musical picture begins to emerge.
That's ultimately what Groove Lab is designed to develop.
Not musicians who simply recreate bass lines.
Musicians who know how to observe, analyze, experiment, and make thoughtful musical decisions wherever they find themselves.
Subscribers receive:
Original compositions
Bass tabs
Practice worksheets
Musical analysis
New Groove Lab lessons
If you're interested in understanding **why music works—not just what to play—join the newsletter.
Groove Vocabulary for Bass Players: The Language Behind Pocket, Feel, and Placement
Most bass players can recognize great groove when they hear it.
They know when a bass line feels tight, laid back, energetic, or relaxed.
The challenge is explaining why it feels that way.
Without a vocabulary for groove, practice becomes guesswork. Advice like "play it tighter" or "lay back" may sound helpful, but it doesn't explain what actually changed or how to recreate that feeling.
Groove Lab approaches groove differently.
Rather than treating groove as an instinct some musicians are born with, Groove Lab treats groove as a collection of musical decisions that can be identified, practiced, and developed over time.
Before we can improve groove, we need a language to describe it.
The Groove Lab Vocabulary Framework
Within Groove Lab, groove is described through six foundational concepts.
These concepts aren't meant to replace creativity or intuition. They provide a shared language for analyzing, practicing, and discussing the musical decisions that shape a groove.
Those six concepts are:
Pulse
Subdivision
Placement
Note Duration
Dynamics & Weight
Space
When musicians say a groove "feels good," they're usually responding to several of these ideas working together.
Understanding them individually allows us to intentionally shape the overall feel of a bass line.
Pulse
Definition
Pulse is the steady beat listeners naturally feel throughout a piece of music. It provides the rhythmic foundation that every other musical decision depends on.
If you've ever nodded your head or tapped your foot while listening to music, you've already been responding to the pulse.
Many songs don't have an instrument explicitly playing every pulse, yet listeners still feel it naturally.
Why It Matters
Without a reliable pulse, every other aspect of groove becomes unstable.
Subdivision, placement, note duration, and dynamics all depend on a consistent internal sense of time.
Practice Focus
Developing a strong internal pulse should be one of every bassist's first priorities.
Continue your study: Timing and Internal Pulse for additional exercises and practice strategies.
Subdivision
Definition
Subdivision describes how the space between pulses is divided into smaller rhythmic units.
These may include:
Eighth notes
Sixteenth notes
Triplets
Shuffle feels
Other rhythmic groupings
Subdivision determines the rhythmic vocabulary available inside the pulse.
Why It Matters
Understanding subdivision allows bass players to create rhythmic variety while remaining locked into the groove.
Different musical styles often distinguish themselves through characteristic subdivisions.
Hip Hop, Jazz, Funk, Swing, and Latin music all organize subdivision differently.
Practice Focus
Rather than memorizing rhythms, develop the ability to consistently hear and perform multiple subdivisions.
Continue your study: Timing and Internal Pulse.
Placement
Definition
Placement describes where notes sit relative to the pulse.
Notes may land:
Directly on the beat
Slightly ahead
Slightly behind
The rhythm itself may remain unchanged while the feel changes dramatically.
Why It Matters
Placement is one of the primary reasons two musicians can play the same rhythm yet create completely different grooves.
Subtle changes in placement influence pocket, momentum, relaxation, and energy.
Practice Focus
Experiment with intentionally moving the same rhythm slightly ahead of or behind the pulse while maintaining consistent time.
Continue your study: Straight vs Swing vs Dilla Time.
Note Duration
Definition
Note duration describes how long a note continues to sound after it has been played.
Two bass players may perform the exact same rhythm using the same notes, yet create completely different grooves simply by changing how long each note rings.
Why It Matters
Note duration determines how the bass interacts with the rest of the ensemble.
Longer notes create sustain and continuity.
Shorter notes create clarity, space, and rhythmic definition.
Learning to control note duration often has a greater impact on groove than learning additional notes.
Practice Focus
Experiment with shortening and lengthening notes while keeping everything else identical.
Notice how the groove changes.
Continue your study: How to Write Better Bass Lines Using Repetition, Space, and Note Duration.
Dynamics & Weight
Definition
Dynamics describe how strongly a note is played.
Weight refers to the perceived emphasis or importance created by that attack.
A softly played note and an aggressively attacked note may occur at the exact same rhythmic location while producing completely different emotional responses.
Why It Matters
Bass and drums share responsibility for shaping the groove.
Changes in articulation, attack, accents, ghost notes, and technique all influence how listeners perceive rhythmic energy.
Practice Focus
Experiment with changing only your attack while keeping every note and rhythm identical.
Continue your study: 3 Bass Technique Exercises That Instantly Improve Your Groove.
Space
Definition
Space is the intentional absence of notes.
Silence is not empty.
It is an active musical decision.
Why It Matters
Many beginning bass players focus on adding more notes.
Experienced bass players understand that leaving space often strengthens the groove.
Space allows other instruments to speak while giving rhythmic ideas greater contrast and clarity.
Practice Focus
Play a familiar groove while intentionally removing one note.
Ask yourself whether the groove became weaker—or stronger.
Vocabulary Isn't the Goal
Learning these terms won't automatically improve your groove.
Being able to hear, manipulate, and intentionally combine them will.
This is where Groove Lab differs from traditional instruction.
Many lessons teach musical vocabulary as information to memorize.
Groove Lab treats vocabulary as a tool for making musical decisions.
Instead of asking,
"What is the correct groove?"
we begin asking,
What happens if I shorten this note?
What happens if I change the subdivision?
What happens if I move this phrase slightly behind the beat?
What happens if I remove this note entirely?
What happens if I change only the dynamics?
Notice how these questions shift the goal away from finding one correct answer.
Instead, they encourage exploration.
Groove becomes something you can investigate, describe, and intentionally shape.
Groove Lab Observation
Most musicians describe groove emotionally.
Experienced musicians can also describe it technically.
That technical understanding allows them to recreate great grooves instead of accidentally discovering them.
The Groove Decision Challenge
Choose a simple one-bar groove.
Play it several times exactly as written until it feels comfortable.
Now repeat the groove several more times, changing only one musical variable during each repetition.
Round One — Change the Subdivision
Keep every note the same.
Experiment with a different subdivision.
Try eighth notes instead of sixteenth notes, or introduce a triplet feel.
Round One — Change the Placement
Keep every note the same.
Experiment with a placing the note slightly before or after the pulse.
Round Three — Change the Note Duration
Play the same notes.
Shorten some.
Lengthen others.
Create more or less space without changing the rhythm itself.
Round Four — Change the Dynamics
Keep every note and rhythm identical.
Experiment with:
stronger accents
softer ghost notes
lighter attack
heavier attack
Notice how the emotional impact changes.
Reflection
After each variation, ask yourself:
Which single change had the greatest impact on the groove?
Which version felt the most natural?
Which version created the strongest sense of forward motion?
Which version best supported the imaginary song you heard in your mind?
Which change surprised you the most?
The goal isn't to discover one "correct" groove.
The goal is to hear how individual musical decisions shape the listener's experience.
Learning Through Diagnosis
If one part of this exercise feels significantly more difficult than the others, don't skip it.
Treat it as useful information.
Experienced musicians rarely view difficult exercises as failures.
Instead, they ask:
"What skill is limiting me right now?"
For example:
If changing subdivisions feels inconsistent, your sense of pulse or subdivision may need additional work.
If moving phrases ahead of or behind the beat feels uncomfortable, placement is likely the skill to revisit.
If changing note duration disrupts the groove, spend more time developing rhythmic control.
If changing dynamics feels uneven, your technique may be limiting your musical choices.
Rather than forcing your way through the exercise, isolate the underlying skill, practice it independently, and then return to the larger musical idea.
Every Groove Lab exercise serves two purposes.
It is both a practice tool and a diagnostic tool.
Sometimes the most valuable thing an exercise teaches you isn't how to play it.
It's what to practice next.
See the Groove Lab Framework in Action
Groove vocabulary is only valuable if it changes the way you think and play.
If you'd like to see these concepts applied in real musical situations, continue exploring Groove Lab:
Groove Lab Study 1 – See how note duration, voice leading, repetition, and harmonic movement work together in an original composition.
Inside Groove Lab: Student Performances & Musical Analysis – Read how students applied these concepts and what they discovered through reflection.
Groove Lab Hub – Explore lessons, studies, backing tracks, and worksheets designed to help you develop musical decision-making instead of simply memorizing bass lines.
Groove isn't something you either have or don't have.
It's something you learn to observe, describe, practice, and intentionally shape—one musical decision at a time.
Inside Groove Lab: Student Performances and Musical Analysis
Groove Lab Studies: Learning Through Musical Decisions
Most bass education teaches players what to play through tabs, transcriptions, and tutorials. While those resources build vocabulary, they rarely explain why musical choices work or how to evaluate your own decisions when creating bass lines.
Groove Lab was built around a different question:
How do musicians learn to make musical decisions?
Each Groove Lab Study combines original music, guided analysis, creative application, and reflection. Rather than memorizing songs, students learn to identify rhythmic and harmonic ideas, experiment with their own solutions, and evaluate the musical impact of their choices.
The student reflections below demonstrate that process in action. Rather than measuring success by how accurately a bass line is copied, they reveal how musicians develop the vocabulary, awareness, and confidence needed to create bass lines of their own.
If you're new to Groove Lab, begin with Timing & Internal Pulse to develop a reliable sense of pulse, then explore Groove Vocabulary to learn the language used throughout these studies. Once those foundations are in place, Groove Lab Study 1 demonstrates how those concepts work together in an original composition.
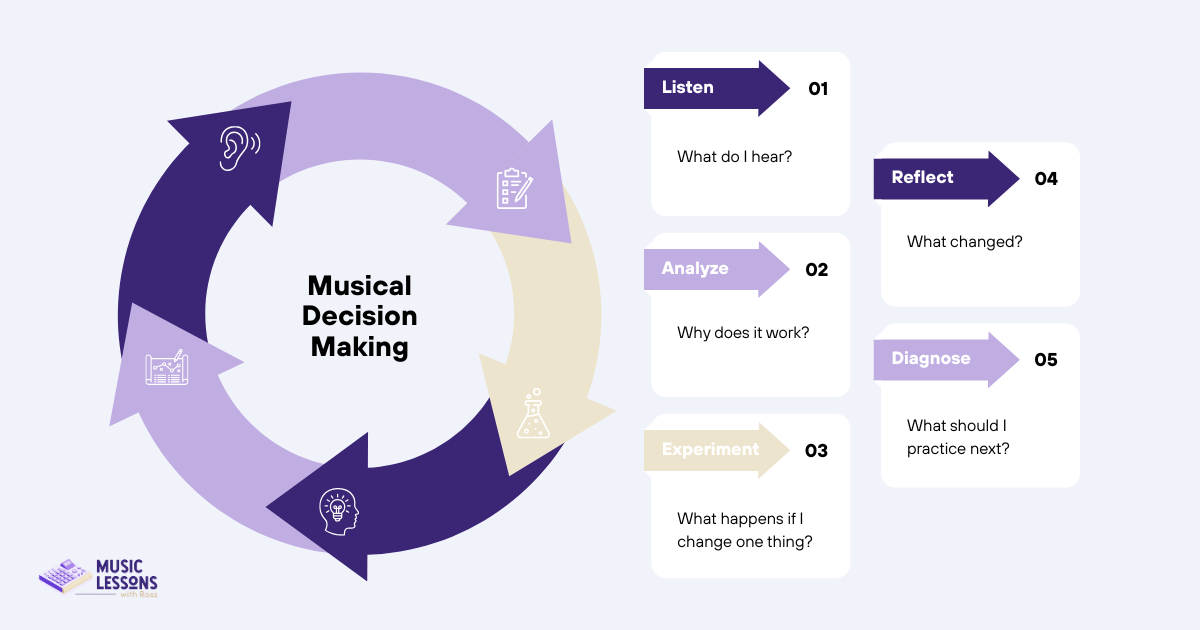
Experience the Same Groove Lab Study
The reflections below all come from students who completed the same Groove Lab Study.
If you'd like to experience the lesson before reading their observations, explore the complete study yourself.
Groove Lab Study:Groove, Feel, and Jazz Harmony
🎧 Listen to the Original Backing Track
Experience the Terrace Martin–inspired Modern R&B groove that serves as the foundation for the study.
See how motif, voice leading, note duration, and harmonic color work together to create a memorable bass line.
🎼 Download the Bass Arrangement
Study the tabs and notation, then experiment with your own musical decisions using the Groove Lab framework.
Groove Lab Study: Groove & Note Duration
“Note Duration. Following the proper notation and not allowing myself to follow the backing track. In this case I was allowing the first 2 16th notes of every measure to sound like quarter notes. This was the same for the quarter note on the & of 2, I would double it to make a whole note. This changed the feel of the song. The duration is important for not playing over other instruments. This groove the bass is more punchy over extending the note muddies the tone of the track. This leads to space, keeping the empty space is the same as overextending a note, you will play over other instruments. Or you will overplay losing the grove.”
Instructor Analysis
One area this student has shown significant progress in is moving away from simply “copying” rhythmic patterns from other instruments and instead finding a more intentional and personal place in the pocket for the bass to sit.
This reflection demonstrates a shift from imitation to intentional listening. Rather than unconsciously matching the rhythm of other instruments, the student recognized that note duration and space are independent musical decisions. That awareness allows the bassist to support the groove instead of competing with it.
They’ve also developed a stronger awareness of note duration, understanding how long notes should ring in order to support the groove, rather than “playing over” the track by allowing notes to sustain too long.
This kind of development points to an important and often overlooked aspect of groove: space and function within the ensemble. Overall, their awareness of how the bass interacts within both the rhythm section and the full band has clearly evolved, and that growth is reflected in their playing.
Groove Lab Study: Harmonic Tension
“The Tension notes brought flare to harmony and instead of just doing something chromatic it added the tension in a way that was quickly resolved to had momentum to the piece and grab the listeners’ attention. Especially by utilizing 3 notes from the chord instead of just 2 bridges the melody and the groove and the style all together in a way that is not “too busy”. The dissonance comes in and then is resolved in the Chord change. The Tension chord tied the chord changes together, in a way that added color.”
Instructor Analysis
One concept this student demonstrated increased awareness of is the relationship between tension notes, their harmonization, and how both impact the overall groove and harmonic movement of a song.
What's encouraging here isn't simply that the student used tension notes. It's that they recognized why tension works. They connected harmonic color, forward motion, and listener expectation into one musical decision. That's the kind of thinking arrangers use every time they write music.
They correctly identified that the most effective placement for tension and dissonance is often leading into a chord change, where it helps create forward motion and resolution. They also recognized that harmonizing an entire chord around tension tones can add additional color and depth to a composition.
This reflects an advanced compositional concept used by arrangers and composers: the ability to generate and control musical tension to maintain interest and energy without needing to change tempo, tonal center, or emotional context.
Groove Lab Study: Rhythm & Self Diagnosis
“I learned that I need to write down the notes of the chords and internalize them while playing, that alone would have cleared up a lot of confusion about the nature of harmonizing for me. I also learned the importance of rhythmic subdivision, which is drafted to help you "fly by wire" through fog, if you know exactly when and where you're supposed to put your notes based on their duration.”
Instructor Analysis
Where this student showed the most improvement was in self-reflection, specifically, their ability to identify sources of confusion and begin strategizing ways to address them.
The more clearly a student can identify, name, and describe a problem in their playing or conceptual understanding, the more effectively they can create targeted steps for improvement. Clarity at this stage is what turns vague frustration into actionable practice.
It’s easy to become focused on performing something “correctly” and lose sight of how and why certain concepts shape bass line creation. In this case, the student demonstrated a willingness to step back and honestly assess where they are in the learning process.
One of the most valuable skills any musician can develop is the ability to accurately diagnose their own playing. Once students can identify the source of a problem, practice becomes focused instead of repetitive. That shift—from frustration to diagnosis—is one of the central goals of Groove Lab.
Groove Lab Is More Than Learning Songs
The student reflections you've just read aren't examples of musicians memorizing bass lines.
They're examples of musicians learning how to think.
Each student listened to the same backing track, studied the same arrangement, and practiced the same musical ideas. Yet each came away with a different insight because they learned to evaluate their own musical decisions instead of simply searching for the "correct" notes.
That's the purpose of Groove Lab.
Not to teach more songs.
Not to memorize more scales.
But to develop the vocabulary, awareness, and confidence to create bass lines of your own.
Every Groove Lab Study is designed to move you through the same process:
Listen before you play.
Analyze before you imitate.
Experiment before you memorize.
Reflect before moving on.
Diagnose what to practice next.
Over time, that process transforms practice from repeating information into developing musical judgment.
Because great bass players don't just know what to play.
They understand why it works.
Continue Your Groove Lab Study
If you'd like to experience this process yourself, start with the same study these students completed.
🎧 Listen to the Original Modern R&B Backing Track
Hear the musical ideas before analyzing them.
📖 Read Groove Lab Study 1: Groove, Feel, and Jazz Harmony
Explore how motif, voice leading, harmony, and groove work together to create a memorable bass line.
🎼 Download the Bass Arrangement
Study the tabs, experiment with your own variations, and apply the Groove Lab framework to your own playing.
Or, if you'd like personalized guidance, schedule a Groove & Harmony Diagnostic and receive feedback on your playing along with a clear roadmap for what to practice next.
Groove Lab Study 1:An Original Lo-Fi Bass Study
Beyond the Key Center
When bass players first learn a song, the most common question I hear is:
"What are the right notes?"
It's a reasonable question, but I don't think it's the most useful one.
A better place to start is:
"What will make this groove feel familiar?"
Because great bass lines don't simply connect chords.
They create stability while everything else changes.
Sometimes that's accomplished through repetition. Sometimes it's space, note duration, articulation, or smooth voice leading. The notes matter, but they're only one part of a much larger musical conversation.
This is one of the central ideas behind Groove Lab.
Rather than treating bass playing as a search for the correct scale, Groove Lab approaches bass line construction as a series of intentional musical decisions that balance stability and change.
This study explores that idea through an original Lo-Fi composition built from harmonic colors that move beyond a single key center.
Listen Before We Analyze
Before looking at the notation or thinking about note choices, spend a minute listening to the track on its own.
Resist the urge to immediately identify a key center or search for the "correct" scale. Instead, listen like a producer or arranger.
Ask yourself:
What musical idea already exists?
Now listen a second time with a different set of questions.
Repetition
Is there a rhythmic motif that already defines the track?
How could the bass reinforce that idea without simply copying it?
Space
Which beats already feel full?
Where is there room for the bass to make a statement?
What happens if the bass intentionally leaves important moments open?
Note Duration
Should the bass sustain into the next phrase?
Would a shorter note create more momentum?
How might articulation change the perceived groove?
Musical Function
Is the bass responsible for creating motion?
Supporting harmony?
Reinforcing the drums?
Or simply providing stability?
Listen for familiarity.
Which rhythmic ideas already feel established?
Which ideas would make the listener feel grounded even as the harmony shifts?
There are no wrong answers.
The purpose of this exercise isn't to predict the arrangement you're about to learn.
It's to develop the habit of listening for musical opportunities before searching for notes.
Every bassist will hear something slightly different, and that's exactly the point.
The arrangement in this study represents one possible solution to the musical problem presented by the track.
Harmonic Analysis
By now we've spent time listening for the groove rather than immediately searching for notes.
That order is intentional.
The motif establishes familiarity first. Harmony provides movement second.
This distinction becomes especially important in music like Jazz Hop, Neo Soul, and modern R&B, where chord progressions often prioritize harmonic color over a single, clearly defined key center.
The progression used in this study moves between Bb minor 11, D7, Ab minor 11, and A-7b5. Instead of functioning as a traditional diatonic progression, each chord is selected for its individual character and the tension or release it contributes to the overall sound.
Because of this, asking,
"What scale fits this progression?"
becomes far less useful than asking,
"How can the bass create continuity while the harmony changes?"
That single question completely changes the role of the bassist.
Rather than relying on one parent scale, we begin thinking of each chord as its own harmonic environment while using the motif to maintain a consistent musical identity.
The harmony creates motion.
The motif creates familiarity.
Together, they create groove.
Bass Line Design
Before writing a single note, I established one guiding principle:
Create familiarity while allowing the harmony to change freely.
Every decision in the arrangement supports that idea.
Motif
The same rhythmic phrase appears throughout the piece, giving the listener something recognizable to follow.
Space
Silence allows the drums and harmony to breathe while reinforcing the motif.
Articulation
Legato and staccato phrasing create contrast without changing the rhythmic identity.
Voice Leading
Small melodic movements preserve continuity as the chords move through different harmonic colors.
Voice Leading as Continuity
Once the rhythmic identity of the bass line is established, voice leading becomes the tool that allows the harmony to evolve without losing that identity.
Voice leading is simply the practice of connecting one chord to the next using the shortest and most musical path possible. Instead of making large jumps, we look for notes that naturally resolve into the next harmonic color.
To review or learn more about what voice leading is and how it works on bass, visit the Voice Leading lesson.
In this study the progression moves through:
Bb minor 11
Bb – Db – F – Ab – C – Eb
↓
D7
D – F# – A – C
↓
Ab minor 11
Ab – Cb – Eb – Gb – Bb – Db
↓
A-7b5
A – C – Eb – G
Notice how many relationships are separated by only a half step:
Db → D
Ab → A
Bb → A
G → Gb
These small movements create a feeling of inevitability and smoothness even though the harmony itself is moving in unexpected directions.
More importantly, this voice leading occurs inside an already established motif.
The rhythmic phrase remains familiar while the harmonic response changes from one iteration to the next. The listener isn't required to relearn the groove every measure—they're simply invited to hear the same musical idea expressed through different harmonic colors.
That's the real purpose of voice leading in this arrangement.
It isn't there to demonstrate theory.
It's there to preserve continuity while allowing the harmony to move freely.
Groove Lab Observation
Many bass players begin by searching for the correct scale.
In practice, listeners rarely experience music that way.
They hear repeated ideas, recognizable rhythms, familiar phrasing, and smooth motion long before they identify a key center.
The strongest bass lines aren't created by finding the "right" notes.
They're created by establishing a memorable motif and making harmonic decisions that allow that motif to evolve without losing its identity.
Motif: The Anchor of the Bass Line
Once I understood the harmonic colors available, I stopped thinking about scales and started thinking about identity.
What musical idea would make this bass line recognizable?
The answer became a simple two-bar motif that repeats throughout the entire study.
Rather than creating a new rhythmic phrase every measure, the motif acts as an anchor. As the harmony shifts between minor 11, dominant, and half-diminished colors, the listener is always returning to a familiar rhythmic idea.
That familiarity is what allows the harmony to become more adventurous without feeling disconnected.
Building the Motif
The motif is intentionally simple.
It begins with a clear statement on beat one, leaves generous space through the middle of the measure, and finishes with a short burst of motion leading into the next phrase.
The second measure responds rather than repeats exactly. The opening note is extended into a longer legato phrase before returning to the same balance of space and movement.
The result feels less like two separate measures and more like a musical conversation:
Call
A direct rhythmic statement that establishes the groove.
Response
The same idea expressed with a different sense of motion and harmonic color.
This call-and-response relationship becomes the rhythmic identity of the entire arrangement.
Motif as Musical Decision Making
At first glance, repetition, space, note duration, articulation, and voice leading can seem like separate concepts.
In practice, they are all serving the same purpose.
Repetition makes the motif recognizable.
Space gives the motif clarity and allows the drums and harmony to breathe.
Note duration shapes its momentum, deciding which ideas feel percussive and which feel connected.
Articulation changes its character, alternating between short rhythmic statements and longer legato phrases.
Voice leading allows the motif to move through changing harmonic colors while preserving its identity.
Each decision reinforces the same musical idea instead of competing for attention.
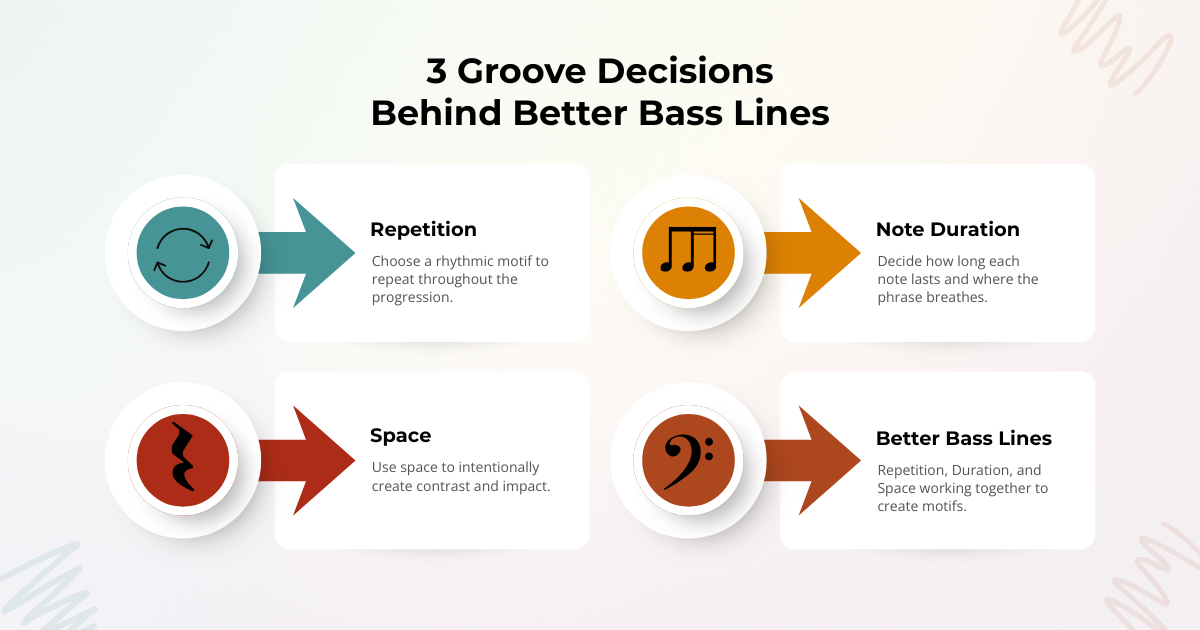
Groove Lab Observation
Many bass players try to create interest by constantly introducing new rhythms or more complex note choices.
This arrangement takes the opposite approach.
The motif remains largely unchanged while the harmony, articulation, and voicing evolve around it.
The listener doesn't remember eight different bass lines.
They remember one familiar idea experienced through different harmonic colors.
That's why motifs are so powerful in Hip Hop, Jazz, Neo Soul, and R&B. They create stability first, making every variation feel intentional rather than random.
Variation Within the Response
If the call establishes the identity of the groove, the response is where the arrangement begins to explore different harmonic possibilities.
Throughout the study, the rhythmic framework remains largely unchanged. The listener continues to hear the same balance of repetition, space, and motion. What changes is how the response outlines the harmony.
Measure 2 — Sliding into the 9
In measure 2, the response begins by sliding from the octave of Ab to the 9 before returning to the octave. This creates a more melodic shape while preserving the identity of the motif. From there, a chromatic phrase connects the root of Ab minor to the root of A-7b5 before resolving naturally to Bb minor in the following measure.
Measure 4 — Half-step approach
Measure 4 approaches the octave from a half-step below before outlining the b7 of the chord. While the rhythmic idea remains familiar, the melodic contour changes. The chromatic movement between Ab minor and A-7b5 returns, reinforcing a harmonic pathway that the listener has already heard.
Measure 6 — Extending the response
Measure 6 revisits the slide from the octave to the 9 and back again, but this time the response continues toward the 5 before briefly touching the 4. Although the note choices differ, the underlying idea remains the same: use small melodic movements to explore the color of the chord while preserving the identity of the motif.
Measure 8 — Simplifying the rhythm
By measure 8, the response becomes even simpler. Repeated root notes grouped in pairs of 16th notes create a more rhythmic statement before the familiar chromatic movement leads us back to Bb minor and completes the cycle.
Notice that none of these variations require a completely new groove.
The motif remains recognizable because its rhythmic identity, use of space, and overall phrasing stay consistent. What changes is the harmonic response.
This is one of the most powerful applications of motif in bass line construction. Rather than constantly introducing new ideas, we can create interest by preserving a familiar framework and allowing harmony, articulation, and melodic direction to evolve around it.
Groove Lab Observation
Many bass players try to create variety by changing the groove itself.
In this study, variety comes from changing the response while preserving the motif.
The listener experiences something familiar and something new at the same time, a balance that sits at the heart of effective bass line construction.
Download the Arrangement
Want to experiment with your own ideas?
Study the arrangement yourself.
Download the bass tabs and use them to write your own responses, compare different voice-leading choices, and apply the Groove Lab framework in your own practice.
→ Download the notation & tabs
Try It Yourself: Keep the Motif, Change the Response
The harmonic color and density of these chords create far more possibilities than the examples presented in this lesson. The bass line you've studied represents just one set of musical decisions among many equally musical options.
Now it's your turn.
Keep the original motif, but write a different response.
As you experiment, pay close attention to voice leading. Listen for opportunities to connect one chord to the next using passing tones, leading tones, chromatic approaches, and common tones. Weak beats are often the perfect place to create movement while preserving the groove.
Next, challenge yourself to think beyond the root.
Many bass players instinctively resolve every chord change to the root note, but strong bass lines often arrive on the 3rd, 5th, or a colorful chord extension instead. Notice how each target note changes the emotional character of the line while the groove remains intact.
The objective isn't to discover the "correct" bass line.
The objective is to learn how intentional note choices shape tension, release, and musical direction without losing the identity of the groove.
Keep the groove. Keep the motif. Change the response.
You may find solutions that serve the music even better than the example I've written.
Reflect Like a Musician
Before moving on, take a few minutes to evaluate your choices.
Which notes felt most stable over each chord?
Which voice-leading ideas created the smoothest movement?
Did your variation strengthen or weaken the original motif?
How did your use of space affect the groove?
Which version would you feel confident repeating throughout an entire song?
If you played your bass line over the original progression tomorrow, would you make the same decisions?
These are the kinds of questions working musicians ask themselves every time they write, arrange, or refine a bass part.
Groove Is Built Through Musical Decisions
One of the biggest misconceptions in bass education is that better bass lines come from learning more scales.
In reality, most bass players already know enough notes.
What they often lack is a process for making musical decisions.
Throughout this Groove Lab study, every choice served a purpose:
The motif created familiarity.
Voice leading connected the harmony.
Rhythm preserved the pocket.
Chord tones and extensions added color.
Space allowed every phrase to breathe.
That's the foundation of great groove.
Great bass lines aren't built by memorizing patterns or searching for the "right" notes. They're built by making intentional decisions that support the music.
That's exactly what Groove Lab is designed to teach.
Rather than memorizing songs note for note, you'll learn how rhythm, harmony, and musical vocabulary work together so you can create bass lines with confidence in any style.
The next time you learn a song, don't just ask:
"What are the right notes?"
Ask instead:
"Why does this groove work, and what musical decisions created that feeling?"
Learning to answer that question is what transforms a bassist from someone who copies grooves into someone who understands how to create them.
Continue Your Groove Lab Study
Ready to go deeper? Continue building your groove vocabulary with these next lessons:
Hip Hop Groove Theory — Learn how rhythm, placement, space, and repetition create compelling bass lines.
Voice Leading for Bass Players — Discover how to connect chords smoothly without relying on root notes.
Timing & Internal Pulse — Build the rhythmic foundation behind every great groove.
Download the notation and tabs — Explore the arrangement and create your own variations.
Schedule a Groove & Harmony Diagnostic — Get personalized feedback and a learning roadmap built around your goals.
How to Write Better Bass Lines Using Repetition, Space, and Note Duration
Understanding Groove Is Different Than Creating Groove
Most bass players can recognize a great groove when they hear one.
Yet many bassists struggle when it comes time to write their own bass lines. They know scales, understand chord progressions, and have learned plenty of songs, but their bass lines still feel stiff, busy, or disconnected from the groove.
In my article on Hip Hop Groove Theory, I explored how repetition, note duration, and space shape the feel of a bass line. In this lesson, we'll take those concepts off the page and apply them to a real musical situation.
Using Sleepless Nights by Dinner Party as inspiration, I'll walk through an original bass arrangement and explain the decisions that shaped it. Rather than treating the bass line as a collection of notes, we'll examine how each choice contributes to the groove and supports the track.
By the end of the lesson, you'll have a practical framework for writing your own Hip Hop and R&B bass lines using the same principles.
Applying Hip Hop Groove Theory to Real Music
Most bass players approach bass line construction by asking:
"What notes should I play?"
While notes matter, great bass lines are rarely defined by note choice alone. The strongest grooves are built through decisions about repetition, note duration, and space. These three elements shape how a bass line feels, how it interacts with the drums, and how effectively it supports the music.
In this lesson, we'll use a Hip Hop-inspired arrangement of Sleepless Nights as a case study to explore how these groove-building decisions work in practice.
What makes modern Hip Hop and R&B bass lines groove is the relationship between repetition, note duration, and space. These are the core elements of Hip Hop bass groove theory, and they shape how a bass line feels just as much as what notes are played.
First, let’s listen to this bass arrangement of Dinner Party’s “Sleepless Nights.” As you go through it, focus on how each of these groove elements shows up in practice, how repetition locks in the feel, how note length shapes momentum, and how space creates room for the rest of the arrangement to breathe.
Download the bass arrangement and follow along as you listen.
Repetition analysis
Many bass players think of repetition as playing the same note over and over again. This often leads to bass lines that rely heavily on the root note, causing both the listener and the bassist to lose interest. A more musical approach is to think in terms of repeating rhythmic phrases rather than repeating individual notes.
In Hip Hop and R&B bass playing, repetition is one of the primary tools used to create groove and establish a strong pocket. Instead of repeating the same pitch, bassists often repeat a rhythmic idea across multiple measures while adapting the notes to fit the harmony underneath.
In this arrangement of Sleepless Nights, I've used the same 1/16-note rhythmic phrase at the beginning of each measure. Even as the chords change, the rhythmic shape remains consistent. This creates continuity, reinforces the groove, and demonstrates a fundamental principle of bass line construction: repeating a rhythmic idea while adapting the notes to the harmony.
This approach also strengthens the connection between the bass and drums. Just as drummers use recurring patterns to define the feel of a song, bassists use repeated rhythmic phrases to create stability and lock into the groove. Together, these repeated patterns are what help establish the pocket and give modern Hip Hop bass lines their forward motion.
As you listen to the arrangement, pay attention to how the repeated rhythmic phrase creates a sense of familiarity even when the notes change. This is one of the foundational concepts of Groove Theory and an essential skill for creating stronger bass grooves.
For a deeper exploration of repetition and groove construction, be sure to read the Groove Theory lesson.
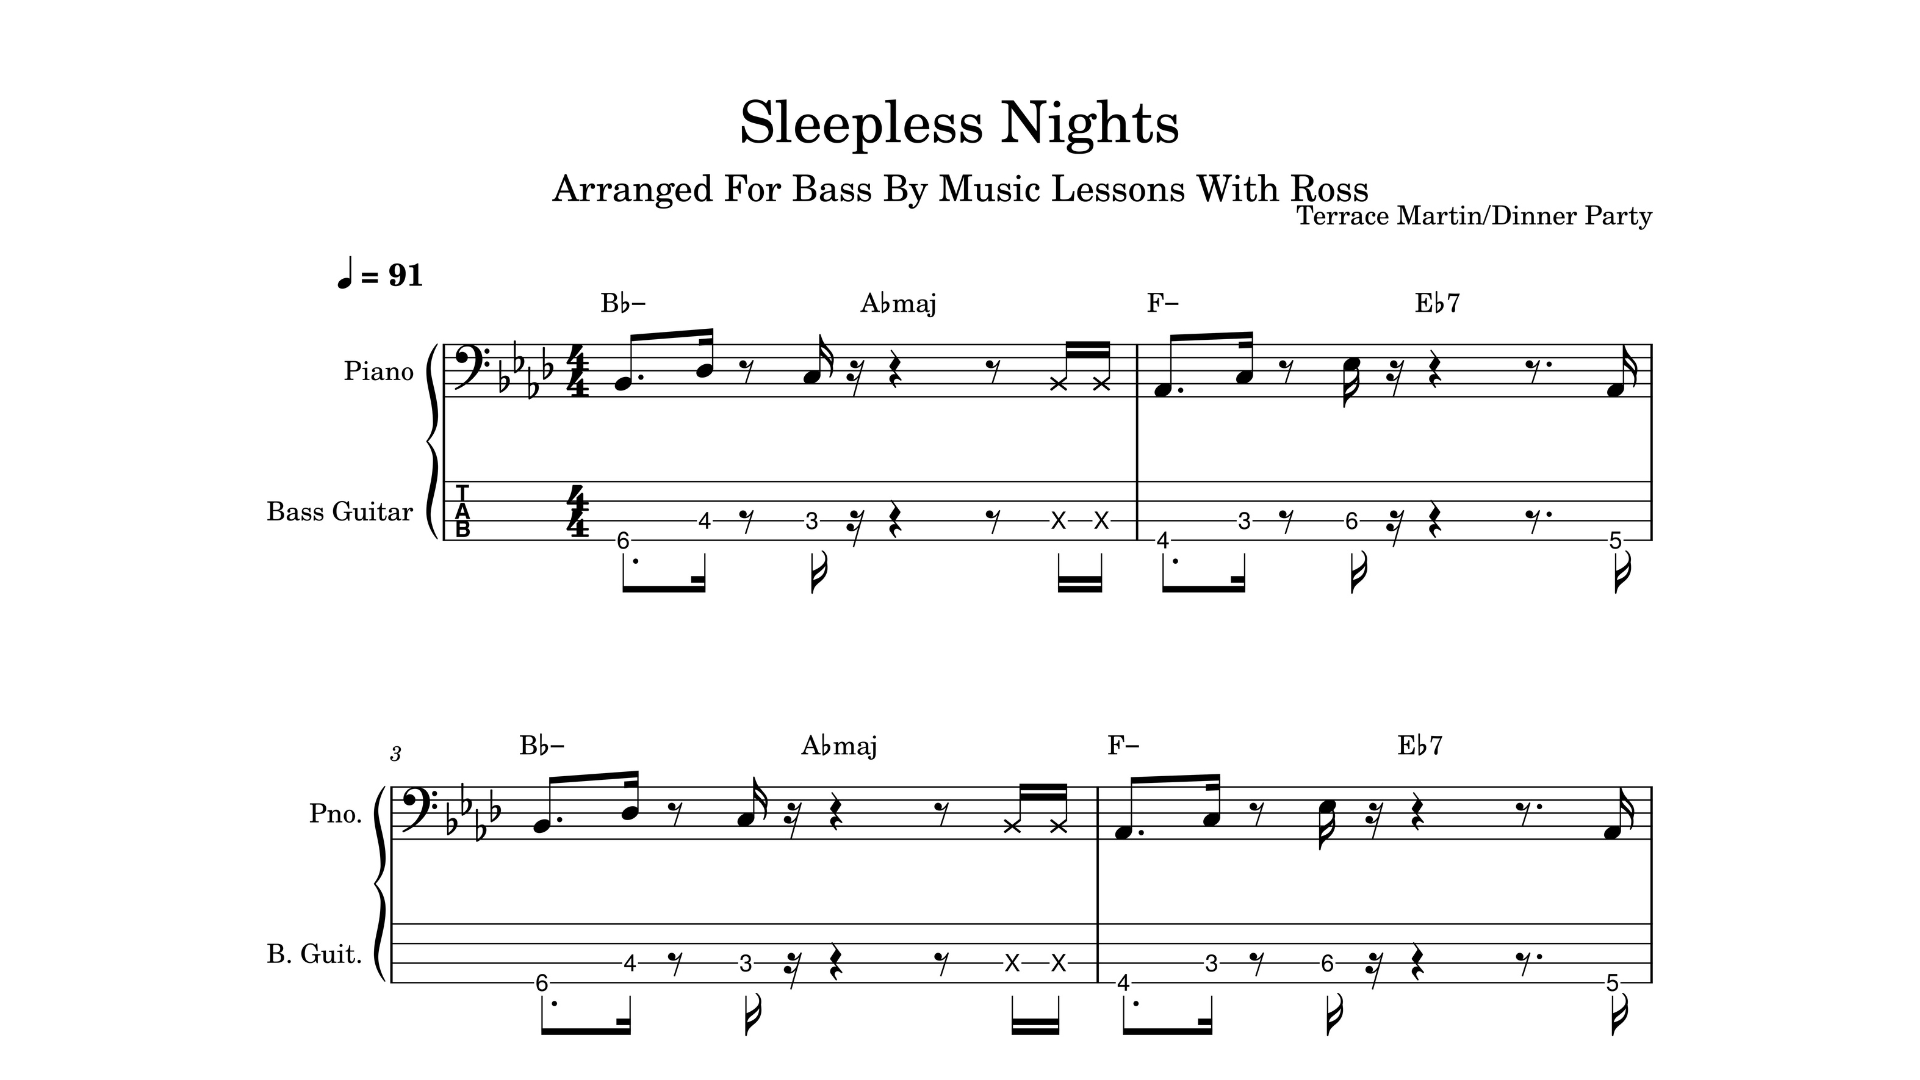
Note duration analysis
Most bassists spend their practice time focusing on where notes begin but rarely pay the same attention to where notes end. As a result, notes often ring longer than intended, creating unnecessary tension between the bass, drums, harmony, and melody. This can make a bass line sound muddy, unfocused, and disconnected from the groove.
To develop a stronger bass groove, players need to practice intentional note duration. Every note should occupy a specific amount of space and contribute to the overall feel of the music. Learning to control note length allows the bass to support the rhythm section while leaving room for the other instruments to breathe.
In this arrangement of Sleepless Nights, intentional note duration is highlighted on the + of beat 2. The 1/16-note is cut off almost immediately after it is played. Rather than functioning as a long sustained note, it acts as a short rhythmic stab that creates space before the next phrase. This small detail helps maintain the bouncy, forward-moving feel that defines the arrangement.
Short, staccato note durations are a powerful groove-building tool found throughout modern Hip Hop and R&B bass lines. By controlling where notes end, bassists can create momentum, strengthen the pocket, and improve their connection with the drums.
As you listen to the arrangement, pay close attention to how the short notes create movement and energy. This relationship between note duration and groove is a foundational concept in Groove Theory and an essential skill for constructing effective bass lines.
For a deeper exploration of note duration and groove construction, be sure to read the Groove Theory lesson.
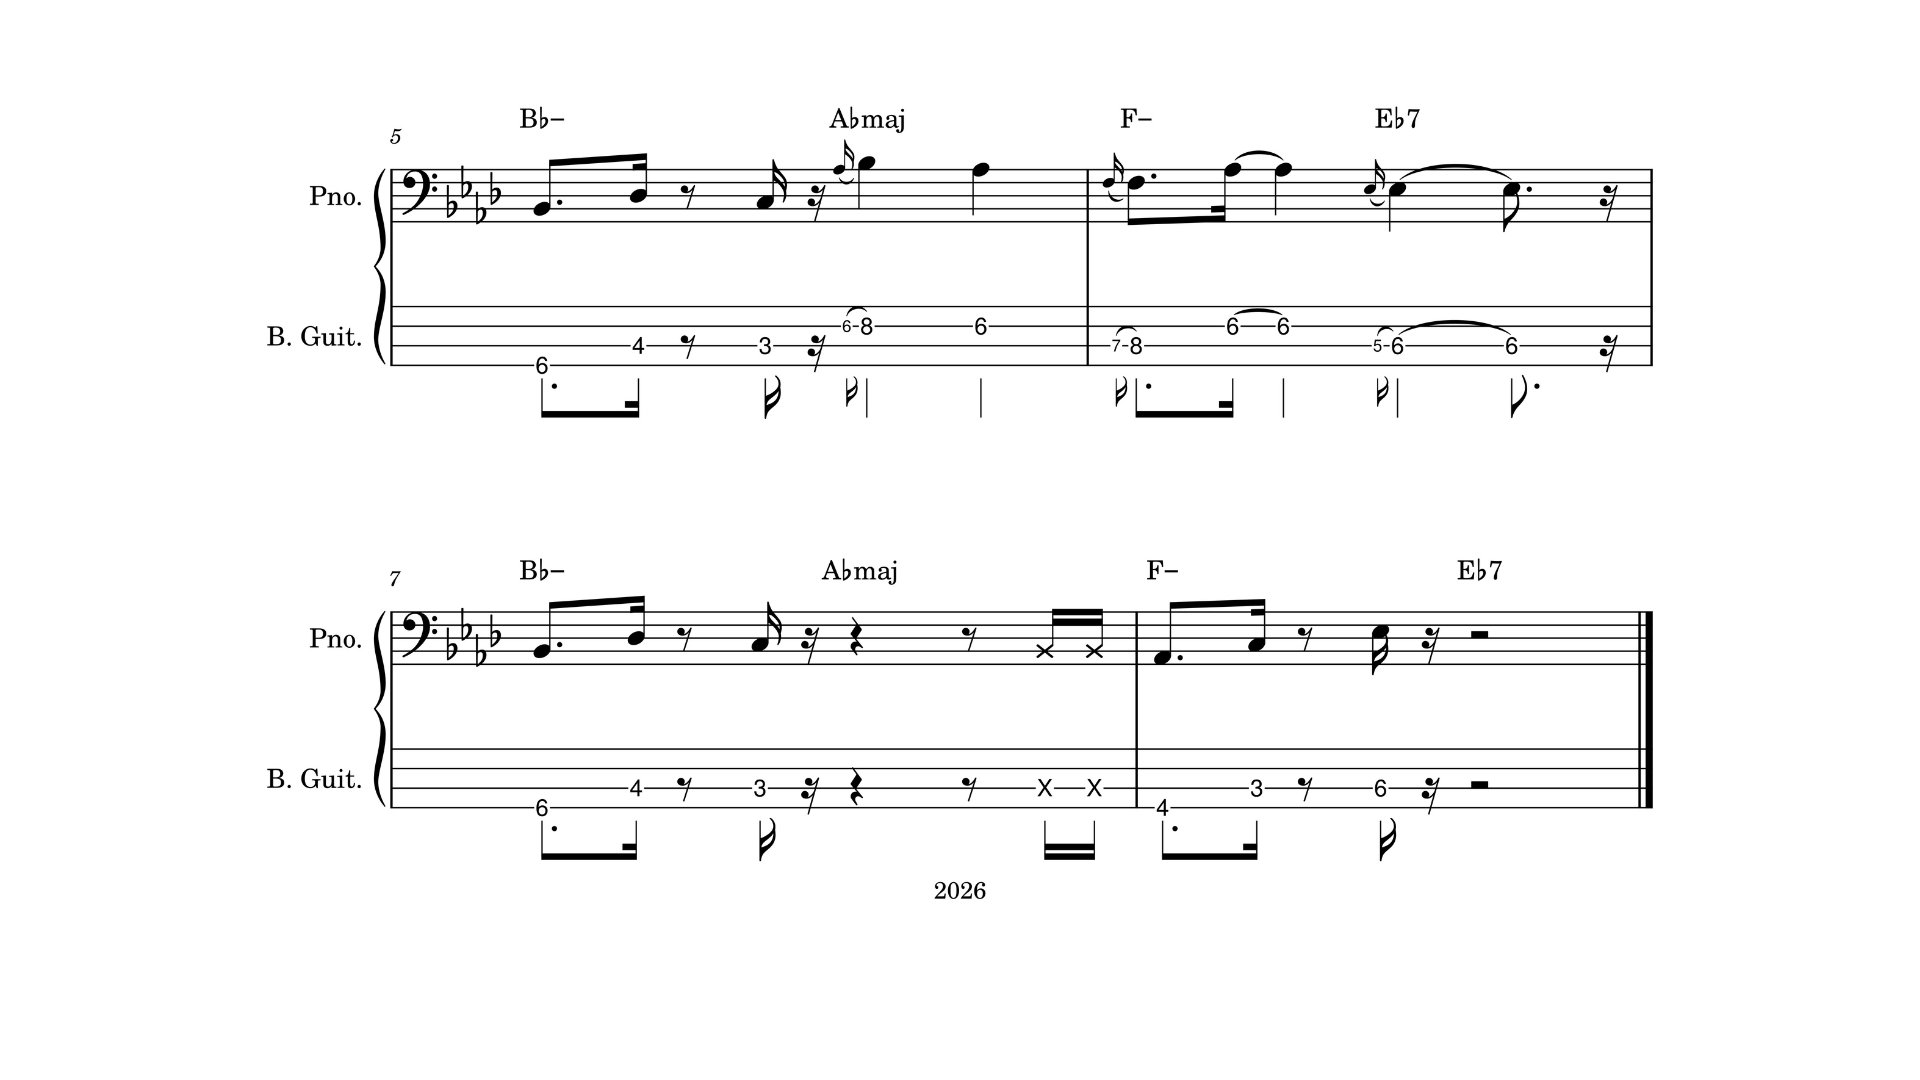
Space analysis
One of the most effective ways to write better bass lines is to use space intentionally rather than constantly adding more notes. While adding complexity can be useful, it often has the opposite effect. The groove loses definition, the bass line becomes cluttered, and you begin competing with the other instruments instead of supporting them.
A better approach is to use space and rests intentionally. In Hip Hop bass playing, space is one of the most powerful tools available for creating pocket, clarity, and forward motion. Learning when not to play is often what separates good bassists from great ones.
Let's look at how space is used in this arrangement.
First, the downbeat of beat 2 is consistently left open. Since the snare drum occupies this space, leaving it untouched allows the backbeat to hit harder and gives the groove more definition.
Second, we rarely play on beat 3. This intentional space serves two important purposes. It creates room for the other instruments to contribute to the arrangement, and it builds anticipation for the next bass note. In groove-based music, anticipation often translates directly into perceived motion, making the bass line feel more active even though fewer notes are being played.
Leaving beat 3 open also creates opportunities for variation. Because that space is established throughout most of the groove, a fill or phrase placed there has a much greater impact when it finally appears. In measures 5 and 6, we introduce a legato phrase on beat 3. Those notes stand out and enhance the groove precisely because the space was left open in the preceding measures.
When constructing a Hip Hop bass line, remember that groove is not created by playing more notes. Often, the strongest bass grooves come from strategically using repetition, note duration, and space to support the music.
For a deeper exploration of space and groove construction, be sure to read the Groove Theory lesson.
Drills That Build the Skills Behind Groove, Space, and Note Duration
Understanding groove is one thing. Executing it consistently is another.
The following drills develop the timing, technique, and note control needed to apply repetition, space, and note duration in your own bass lines.
The concepts of repetition, note duration, and space are what create pocket in Hip Hop and R&B bass lines. But understanding these ideas is only the first step. The real question is: what drills help you develop the ability to actually use them when playing bass?
These concepts matter because groove is not created by notes alone. Groove emerges from the decisions bass players make about what to repeat, what to emphasize, and what to leave out.
A strong Hip Hop bass groove depends on one foundational skill: consistent internal rhythm. Without it, concepts like space and repetition lose their impact.
One of the simplest but most effective ways to develop this is the Up/Down drill. This exercise connects your physical motion to time. Move your head or heel with the pulse of a metronome or drum loop, then add plucks on each downbeat. This builds a direct relationship between physical feel and rhythmic placement.
From there, you can expand into subdivision control, which is essential for modern bass groove and pocket playing. Start with the Up/Down drill, then begin adding plucks on different subdivisions:
Downbeats only
Upbeats only
Both downbeats and upbeats
This forces you to hear and feel how subdivisions shape the groove, rather than just count them.
The next step is moving beyond counting entirely and developing internal pulse and feel-based timing. The Ahead / Behind / On drill is designed for this. Play a repeated bass phrase in three ways:
slightly ahead of the click
slightly behind the click
directly on top of the beat
The goal is not perfection. The goal is awareness. This exercise develops a deeper, more intuitive relationship with rhythm—one that counting alone cannot produce.
Over time, these drills help shift your playing from “measured rhythm” to “felt rhythm,” which is where Hip Hop bass grooves begin to feel natural, relaxed, and controlled.
You can explore these concepts further in the Time and Internal Pulse lesson, where these drills are broken down in more detail.
Technique Drills That Improve Groove and Note Control
The technique you use when playing bass has a direct impact on your ability to improve bass groove and control note duration. In Hip Hop and R&B bass playing, even small inconsistencies in plucking, muting, or fretting can weaken the pocket and reduce clarity in the bass line.
These drills are designed to build consistent bass technique, improved note control, and stronger groove execution.
Alternate Plucking Drill
One of the most effective ways to build consistent plucking technique is the Alternate Plucking drill.
Start by anchoring your thumb either on the pickup, the E string, or the nearest stable string. From there, pluck throughthe string (not upward) using your index finger, then your middle finger. Continue alternating fingers with each note.
This develops:
consistent articulation
even note volume
stable rhythmic execution
stronger groove control
Over time, this creates a more balanced and predictable right-hand technique, which is essential for tight Hip Hop bass lines.
Muting Drill (Note Duration Control)
Next is the Muting drill, which is one of the most important skills for controlling note duration and groove clarity.
As you alternate plucking, allow the next finger in your sequence to lightly touch the string after each note to mute it before the next pluck. This creates intentional separation between notes and prevents unwanted ringing.
Start slowly:
One pluck = quarter note
One mute = quarter note
Then repeat the cycle with consistent timing.
This drill builds awareness of note length, space, and articulation, which are all essential components of bass groove and pocket.
Fretting Hand Finger Control Drill
Finally, your fretting hand plays a major role in overall groove consistency. A strong bass line depends on comfort and control across all four fingers—especially the pinky, which is often underdeveloped.
Start by playing notes on a single string in sequence:
Index finger → middle finger → ring finger → pinky finger
Focus on staying relaxed and consistent as you move across frets.
This drill improves:
fretting hand independence
finger strength and control
note accuracy
overall bass line fluidity
Neglecting the pinky often creates uneven bass lines, especially at faster tempos or more syncopated Hip Hop grooves.
Explore Further
You can explore these concepts in more depth in 3 Bass Technique Exercises That Instantly Improve Your Groove, where each drill is broken down in detail with practical applications for Hip Hop bass playing.
Groove Is Built Through Decisions
Learning how to write a bass line isn't just about choosing notes. It's about making intentional decisions about repetition, note duration, and space. These groove-building tools are foundational to Hip Hop bass playing and can be applied to virtually any style of music.
Many bass players search for better notes, more advanced scales, or more complex techniques when trying to improve their grooves.
In reality, great bass lines are often built from a handful of simple decisions.
What do you repeat?
What do you leave out?
How long should each note last?
The answers to those questions shape the groove far more than the notes themselves.
The concepts explored in this lesson—repetition, note duration, and space—are just one part of the larger Groove Lab framework. If you'd like to continue developing these skills, explore the related Groove Theory, Time & Internal Pulse, and King Kunta Groove Study lessons.
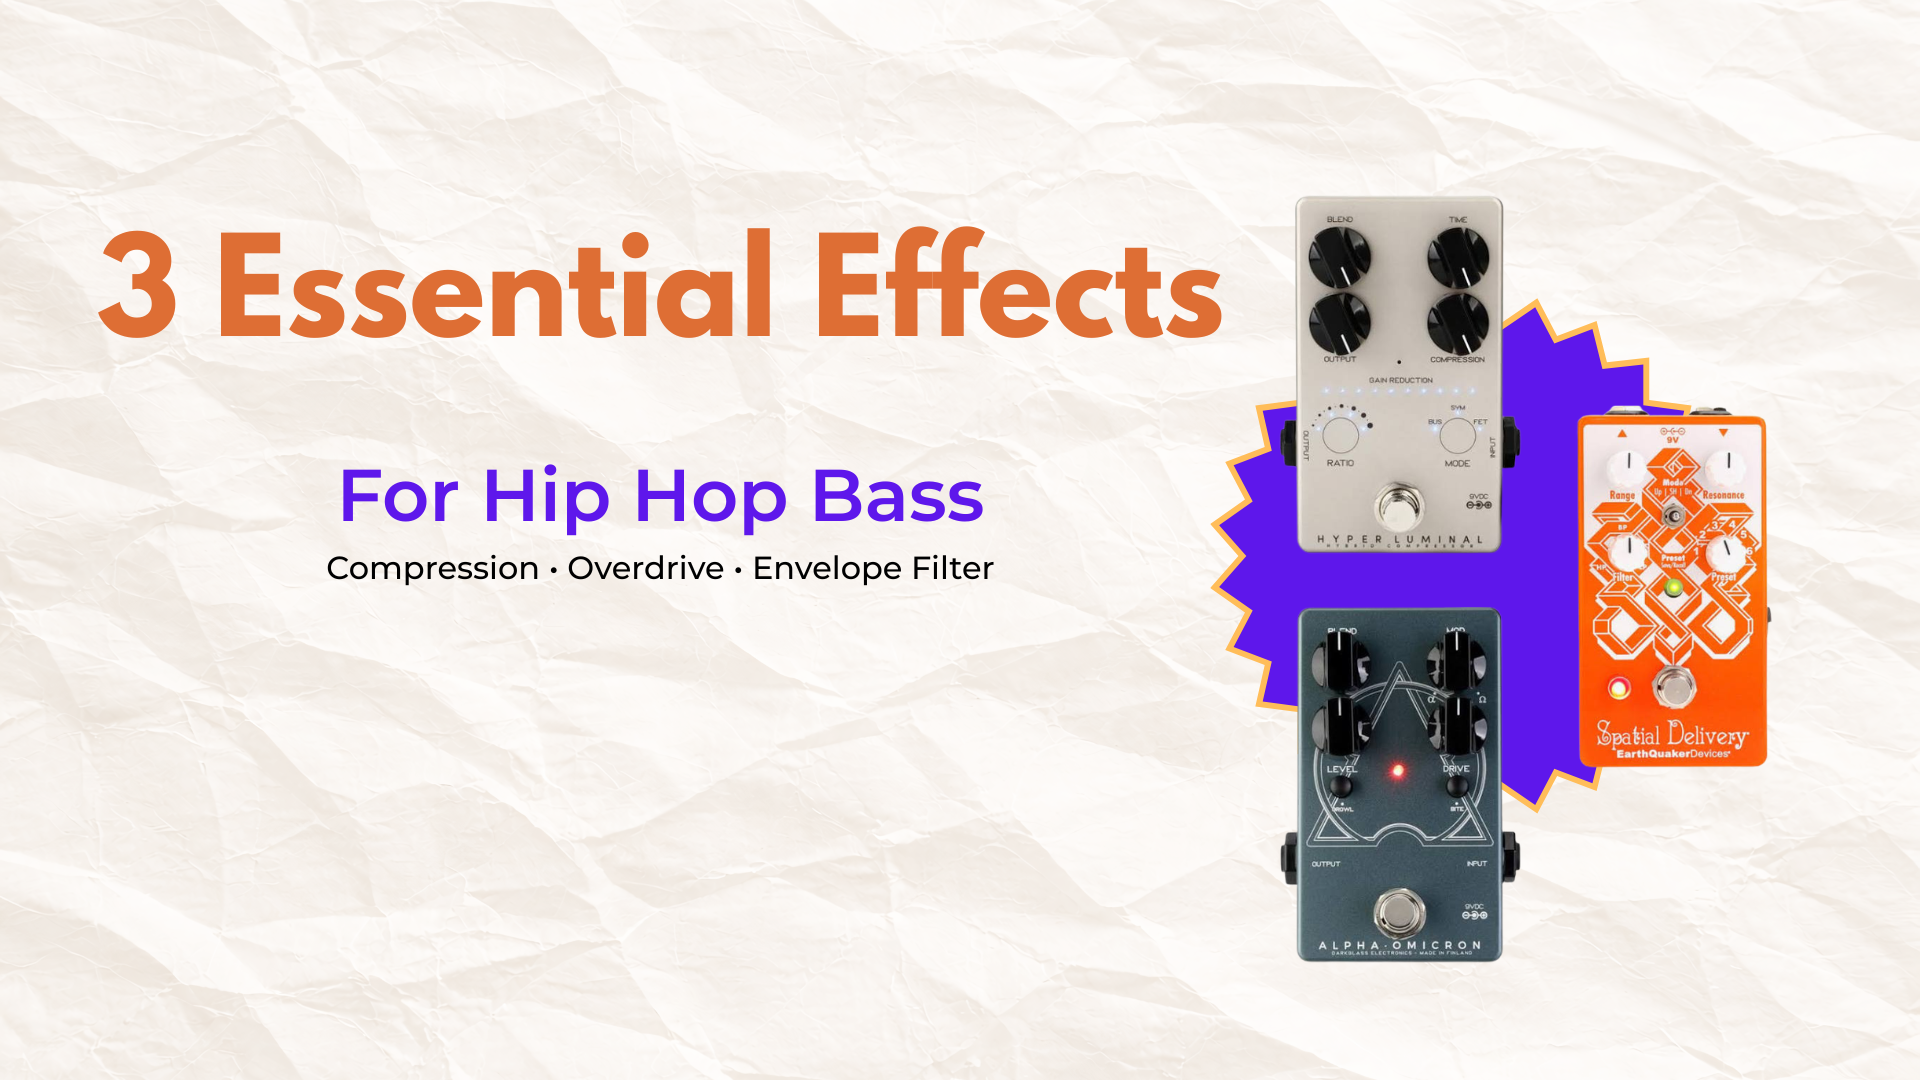
3 Essential Effects for Hip Hop Bass
3 Essential Effects for Hip Hop Bass
Introduction
When most people think of effects pedals, hip hop isn't the first genre that comes to mind. But if you've ever wondered why your favorite hip hop basslines hit so hard, chances are there's at least one effect unit behind that sound.
The bass is arguably the most important element in a hip hop song. It drives the groove, locks in with the kick, and sets the emotional tone of the track. And while the genre is known for keeping things clean and in the pocket, the right effects can take your bass tone from flat to full.
In this article, we'll break down three essential effects for hip hop bass, with a real-world song example for each one so you can hear exactly what we're talking about.
Effect 1: Compressor
While compression isn't as flashy as some other effects, it's an essential part of any vintage or modern bass tone. When dialed tastefully, it tightens dynamics, sustains notes, glues the bass to the kick, and creates that thumpy, solid bass foundation heard on countless hip hop records.
While the effect is often subtle, think of a compressor as the invisible hand keeping your bass in check, evening out the loud notes, lifting the quiet ones, and making everything sit perfectly in the mix. For hip hop, especially, where the bass and kick drum need to move as one, compression isn't optional.
Hearing It In Action: Anderson .Paak - Come Down
"Come Down" is an excellent example of how important compression is for a hip hop bass tone. The bassline sounds punchy, controlled, and never fights for space. That kind of consistency is what happens when compression is working behind the scenes to keep every note tight and the groove locked in.
Effect 2: Overdrive / Saturation Pedal
If compression is the invisible hand, overdrive is the personality. A touch of saturation adds harmonic richness and warmth to your bass tone without losing the low-end weight that makes hip hop bass hit the way it does. We're not talking about the aggressive distortion you'd hear in a rock or metal context. Rather, hip hop stays on the warm, subtle side.
The difference between overdrive and distortion matters here. Distortion replaces your clean signal with clipped, aggressive grit. Overdrive pushes your signal into a natural, musical breakup, more like the warmth of a tube amp being driven hard than a pedal trying to shred. For bass, that distinction is everything. Too much gain and you lose the low end. The right amount, and your bass suddenly has character.
Hearing It In Action: Mac Miller - What's the Use?
The bass on "What's The Use" is a masterclass in tone. It's thick, slightly gritty, and sits perfectly in a dense, layered mix without ever getting muddy. That warm texture is saturation doing exactly what it should: adding presence and personality while keeping the low end intact.
Effect 3: Envelope Filter
The envelope filter is the perfect tool to make your hip hop basslines more expressive. This pedal responds dynamically to how hard you play; when you dig in, it opens up, and when you play softly, it stays closed. The result is a funky, vocal quality that adds movement and groove to your bass lines in a way no other effect can replicate.
What makes the envelope filter work so well in hip hop is how naturally it fits into the genre's roots. Hip hop has always drawn heavily from funk and soul, and the envelope filter is one of the most distinctly funky sounds in music. Applied tastefully, it brings that classic sound to a modern context without feeling out of place.
Hearing It In Action: Thundercat - Them Changes
Thundercat's playing on "Them Changes" is a masterclass on how to use an envelope filter with taste. The filter opens and closes with his phrasing, giving the bass line a breathing, almost human quality. It grooves without being excessive, and it sits in the track perfectly. If you want to hear what a well-dialed envelope filter sounds like on bass, this is the song.
Bonus: Preamp & Sub Bass Enhancement
If you want your bass to be felt as much as it's heard, a preamp pedal is your best friend. While the three effects above shape and color your tone in obvious ways, a preamp works at a more foundational level, strengthening your signal and giving you studio-quality tone control right on your pedalboard. Think of it less as an effect and more as the backbone of your entire bass rig.
Sub bass enhancement takes that idea further. By boosting and reinforcing the frequencies below what most speakers can fully reproduce, you create that deep, physical low-end presence that makes hip hop bass feel powerful on any system.
Hearing It In Action: OutKast - So Fresh, So Clean
The bass on "So Fresh, So Clean" is a perfect example of sub bass done right. It's not flashy or overprocessed: it's deep, full, and authoritative. You feel it before you consciously hear it, and that's exactly the goal. A good preamp pedal with some low-end shaping is what gets you to that place.
Conclusion
Effects pedals aren't just for guitarists. As we've seen from Anderson .Paak, Mac Miller, Thundercat, and OutKast, some of the most iconic bass tones in hip hop history, have a little help from the right gear.
The beauty of these four effects is that none of them requires you to overhaul your setup or break the bank. Start with a compressor to lock in your dynamics, add a touch of overdrive for warmth and character, experiment with an envelope filter when you want to bring the funk, and let a preamp pedal handle the foundation of your tone. Used together or even individually, these can transform a flat, lifeless bass signal into something that genuinely moves people.
Above all, a great hip hop bassline is built on feel. So plug in, dial in, and trust your ears.
The best hip hop bass lines combine note control, feel, and intentional bass tone. Effects can help shape that tone, but it's the combination of all three that gives a bass line its character, impact, and groove. Here are a few hip hop bass lessons to help you get started:
Hip Hop Bass Lessons: Time & Internal Pulse
Hip Hop Bass Lessons: Hip Hop Groove Theory for Bass Players
Groove Lab One: Hip Hop Bass Lessons - How To Write Bass Lines For Hip Hop Beats
Written by Ian Sniesko from DeathCloud, curating the finest guitar pedals for tone chasers and gear heads alike.
Hip Hop Bass Lessons: 3 Bass Technique Exercises That Instantly Improve Your Groove
Groove isn't just rhythm.
Groove depends on technical control.
If your plucking hand is inconsistent, your bass lines will have uneven volume and inconsistent tone, making it harder to create a solid groove.
If your muting technique is sloppy, unwanted string noise can build up and weaken the connection between the bass, kick drum, and snare.
If your fretting hand lacks coordination, you'll spend more attention managing difficult finger movements than listening to the pulse and feel of the groove.
When these technical barriers are removed, something interesting happens. Your bass playing becomes cleaner, more consistent, and easier to control. Notes land with confidence. Muting becomes automatic. Your plucking and fretting hands work together without hesitation.
Instead of fighting the instrument, you can focus on dynamics, articulation, note length, and time feel—the musical details that make a groove feel deep and effortless.
Technique isn't separate from groove. It's the foundation that allows groove to happen consistently.
The following bass technique exercises are designed to improve plucking consistency, muting control, and finger coordination so you can play cleaner bass lines and develop stronger groove.
Bass Plucking Technique: How To Play Every Note With Consistent Tone
Alternate Plucking Drills
This bass plucking exercise develops alternate finger technique, consistent tone, and greater control over your fingerstyle bass playing.
Set a metronome or drum track to 60 BPM and play quarter notes on a single string. Anchor your thumb on the neighboring lower string, or on the body of the bass when playing the E string.
Using a through-motion rather than an upward motion, alternate between your index and middle fingers. Focus on producing the same volume, tone, and attack with every note. The string can be muted or played open.
Record yourself periodically and review the footage. Pay close attention to uneven note volume, inconsistent tone, excess hand movement, or any physical tension that makes the motion feel awkward.
The goal isn't speed. The goal is developing a plucking technique that feels relaxed, efficient, and consistent.
Focus on producing the same volume, tone, and attack with every note. Consistent notes create a more stable groove.
How to Measure Growth
You've made progress when alternating between your index and middle fingers feels automatic and no longer requires conscious effort to maintain accuracy, timing, or consistent tone.
Bass Muting Technique: How To Eliminate String Noise And Play Cleaner Grooves
Muting Drill
This bass muting exercise builds on the previous alternate plucking drill. It helps develop better muting technique, reduce unwanted string noise, and improve overall control of your bass grooves.
Set your metronome or drum track to the same tempo, but switch from quarter notes to eighth notes.
Begin by plucking an open or muted string with your index finger on the downbeat. Before the next note, lightly touch the string with your middle finger—just enough to stop it from vibrating. Without lifting the finger away, continue the motion and pluck through the string with the same finger on the next downbeat.
Repeat the process with each finger:
Touch the string to mute it on the upbeat.
Pluck through the string with that same finger on the following downbeat.
Alternate between your index and middle fingers.
Think of each finger performing two jobs: first muting the string, then producing the next note.
This creates a continuous cycle of muting and plucking that develops cleaner bass technique and greater control over note length. Because the muting action is synchronized with the rhythm, you'll learn to control string noise without losing your sense of time or groove.
How to Measure Growth
You've made progress when muting feels automatic, unwanted string noise is reduced, and you can clearly control when each note starts and stops without disrupting the groove.
Bass Finger Coordination: How To Strengthen Your Pinky For Smoother Bass Lines
Finger Coordination Drill
This bass finger coordination exercise develops fretting-hand control, finger independence, and pinky strength. It also helps improve the transition between fretted and open notes, a common challenge for many bass players.
Set a metronome or drum track to 60 BPM and play quarter notes on the G string.
Begin with your index finger fretting the 3rd fret. Play the fretted note, then lift the finger away from the string using an exaggerated but controlled motion and play the open G string. Continue alternating between the fretted note and the open string.
Repeat the exercise with each finger:
Index finger on the 3rd fret
Middle finger on the 4th fret
Ring finger on the 5th fret
Pinky finger on the 6th fret
Focus on making each movement deliberate and controlled. Avoid rushing to remove the finger or allowing the hand to collapse as you move through the exercise.
The goal is to develop finger independence and strengthen the connection between your fretting hand and your internal sense of time. Pay special attention to the pinky finger, as it is often the weakest and least coordinated finger for bass players.
How to Measure Growth
You've made progress when each finger can alternate cleanly between fretted and open notes without excess tension, unwanted movement, or disruption to the groove. The pinky should feel stronger, more coordinated, and easier to use in everyday bass lines.
A Simple Bass Practice Routine For Better Groove
You don't need to spend hours practicing these exercises to see results.
In fact, consistency matters far more than duration.
Try adding these drills to the beginning of your practice sessions:
3 minutes of Alternate Plucking
3 minutes of Muting Practice
3 minutes of Finger Coordination
Focus on control, relaxation, and consistency rather than speed.
If an exercise feels awkward, resist the urge to play faster. Slow down and pay attention to the quality of each repetition. Groove is built through consistent movement, not rushed movement.
As these exercises become easier, gradually increase the tempo or explore more challenging variations. The goal is to develop technical control that feels automatic, allowing more of your attention to shift toward timing, feel, dynamics, and pocket.
Remember: these exercises are not about building flashy chops. They're about removing technical barriers so you can play with better groove.
Technical control is only one part of the groove equation. Once your hands can execute consistently, the next step is developing the internal pulse that allows those notes to sit confidently in time.
Many Hip Hop bass lines rely on precise note length, consistent attack, and controlled muting. These technical skills become much easier to hear when studying real grooves.
Ready To Build Better Groove?
Most bass players know they need better groove.
What they don't always know is why their groove feels inconsistent.
Sometimes it's timing. Sometimes it's note length. Sometimes it's a technical limitation that's quietly getting in the way.
If you're not sure what's holding your groove back, I can help.
Book a free consultation and we'll identify the biggest obstacles in your playing, create a clear improvement plan, and discuss whether private lessons or Groove Lab are the right fit for your goals.
Book Your Free Consultation → Schedule Here
Hip Hop Bass Lessons: Time & Internal Pulse
From Fundamentals to Funky
This lesson teaches fundamental rhythm exercises on bass for building timing and internal pulse. They are great for beginners to get started, or as warm ups for more experienced players.
Every musical journey starts somewhere, and for bass players that starting point is groove, rhythmic feel, and pocket.
Maybe you picked up the bass to learn your favorite songs, play with friends and family, or simply explore a new creative outlet. If you've spent some time learning songs from tabs, developing your plucking and fretting technique, and getting comfortable with the basics, you may be wondering:
What's next?
If you're excited to move beyond simply playing notes and start understanding what makes great bass playing feel good, this lesson is for you.
As bassists develop their skills, it's common to become interested in advanced techniques like slapping, tapping, or chordal playing. While those techniques can be valuable tools, the bass players who consistently get called for gigs have something even more important: a deep relationship with rhythm.
They may be able to play the flashy stuff too, but they never lose sight of the fundamentals.
Here in Groove Lab, we believe groove isn't something you're born with. It's a skill that can be practiced, observed, and developed.
So if you're ready to improve your groove, strengthen your pocket, and build a stronger rhythmic foundation, let this lesson be your guide for bass timing exercises.
Consistent Rhythm: Feeling Over Counting
"Feel the groove."
It's one of the most common pieces of bass advice you'll ever hear.
It's also one of the most frustrating.
Because what does that actually mean?
More importantly:
How do you practice it?
The ability to feel rhythm starts by connecting your body to the beat. Before counting subdivisions or analyzing rhythmic patterns, we need to develop an awareness of how rhythm feels physically.
The following exercise is a simple but effective way to connect movement, sensation, and timing. Rather than relying exclusively on counting, it helps train your body to recognize and respond to a steady pulse.
Up/Down Drill
This beginner bass practice exercise can be practiced with your favorite music, but it's recommended to begin with a metronome or drum loop set to 60 BPM.
Start by simply listening to the beat and allowing your body to move naturally with the pulse.
As your head moves down, notice where it aligns with the beat. This is the downbeat, the pulse we would typically count as:
1 2 3 4
As your head rises up, notice the space between those beats. This corresponds to the upbeat, often counted as:
1 + 2 + 3 + 4 +
You can count along if you'd like, but don't worry about counting just yet. For now, focus on the physical motion.
Next, add your foot.
Tap your heel on the floor while matching the direction and tempo of your head movement.
Once both motions feel comfortable, stop trying to "do" the exercise and simply sit with the beat.
Observe what your body is experiencing.
You may notice sensations in your:
foot
calf
leg
shoulders
neck
lower back
There are no right or wrong observations.
These sensations provide feedback about how relaxed, tense, or connected your body is to the rhythm. Learning to recognize those signals is an important step toward developing a stronger internal sense of time.
Over time, those physical cues become valuable guides, helping you make subtle adjustments while playing bass without becoming distracted by overthinking.
Use this drill as a daily warm-up and keep a notebook nearby to record your observations.
As your awareness develops, you'll begin to recognize these same sensations while practicing bass lines, groove exercises, and songs. Eventually, the connection between rhythm and movement becomes more natural and intuitive.
This is the foundation of feeling the groove.
Not magic.
Not talent.
Simply learning to connect your body, your attention, and your perception to the pulse of the music.
Feeling → Playing Subdivisions
Quarter-Note Pulse
Now that you've established a physical relationship with rhythm, the next step is learning how to transfer that connection to the instrument.
To play this beginner bass practice, begin with a metronome or drum loop set to 60 BPM. Start with the Up/Down Drill until your movement feels comfortable and natural.
Next, on each down pulse, pluck an open string on the bass and let it ring until the next downbeat.
The goal is not to focus on the plucking motion itself. Instead, keep your attention on the physical pulse in your body and allow the bass to follow that movement.
Practice for 1–2 minute intervals and film yourself while you play. When reviewing the recording, look for:
Consistent timing
Relaxed body language
Continuous head movement
A common mistake is allowing a missed note or small error to interrupt the pulse. When this happens, many players become distracted, begin overthinking, and hesitate. Those moments of hesitation are often the source of rhythmic inconsistencies.
Once the open-string version feels comfortable, begin introducing fretted notes. Play a single fretted note four times, then remove your finger and play the open string four times. Continue alternating between the fretted and open notes for 1–2 minute intervals.
The objective is to maintain your physical connection to the pulse while adding new technical demands. Rhythm and groove remain the primary focus; fretting and plucking are secondary concerns.
Over time, your technique will improve naturally without disrupting your connection to the beat. This ability to stay connected to the pulse—even while managing increasingly complex musical tasks—is one of the foundations of strong groove and pocket.
Eighth-Note Pulse
The next subdivision to develop is the eighth-note pulse, counted:
1 + 2 + 3 + 4 +
The "+" counts occur as your body moves upward during the Up/Down Drill. Most bass players can play straight eighth notes without much difficulty, but it's still valuable to spend time counting, feeling, and performing them as part of your daily warm-up.
The real challenge begins when notes are separated by rests.
Many players can execute eighth notes accurately when they are played continuously, but struggle to maintain the internal pulse when notes are removed. Learning to feel the "+" count even when nothing is being played is an essential part of developing groove, pocket, and rhythmic consistency.
The following exercise is designed to strengthen that exact skill.
Begin with a metronome or drum loop set to 60 BPM.
Start by clapping the following pattern:
Measure 1: Clap on beat 1 and beat 4.
Measure 2: Clap on the "+" of 1 and the "+" of 4.
Repeat these two measures continuously.
Using claps instead of the bass allows you to focus entirely on rhythm without the added demands of plucking and fretting.
This drill is often challenging because of the changing rests and note groupings. Playing on beat 4 and then waiting until the "+" of 1 in the next measure tests your ability to feel the space between notes accurately. Likewise, playing on the "+" of 4 and then immediately on beat 1 can feel rushed, even though the timing is correct.
These shifting relationships between notes and rests are what make rhythm feel musical rather than mechanical. By alternating between these two simple patterns, you learn to maintain a steady internal pulse while navigating changing rhythmic phrases.
Record yourself periodically and listen back for consistency. Pay attention to whether the pulse remains steady throughout the exercise and whether your body continues moving naturally with the beat.
Most importantly, don't treat mistakes as failures. Instead, view them as feedback. Every rhythmic inconsistency reveals an area where your internal pulse is still developing, giving you a clear direction for future practice.
On, Ahead, Behind
This final drill is the most challenging in the series, but it can have a dramatic impact on your groove, pocket, and overall musical feel. This is how to develop better timing on bass guitar.
The concept is simple: learning to place notes directly on the beat, slightly ahead of the beat, and slightly behind the beat while maintaining a consistent pulse.
Begin with a metronome set to 60 BPM and play steady quarter notes.
Start by placing each note directly on top of the click, just as you did in the Quarter-Note Pulse drill. Focus on matching the click as precisely as possible.
Next, play one measure with your notes slightly ahead of the click. The goal is not to rush, but to intentionally place the note just before the metronome.
After one measure, return to playing directly on top of the click.
Then play one measure with your notes slightly behind the click. Again, the goal is not to drag or slow down, but to intentionally place the note just after the metronome.
After one measure, return to playing directly on top of the click.
Continue alternating between:
On the beat
Ahead of the beat
On the beat
Behind the beat
This exercise is deceptively difficult because playing ahead of or behind the beat often feels unnatural at first. Many players instinctively correct themselves because the placement feels "wrong."
In reality, you are developing greater control over rhythmic placement and increasing your awareness of how notes interact with the pocket. The ability to intentionally place notes in different parts of the beat is one of the defining characteristics of experienced bass players.
Many styles—including Hip Hop, R&B, Funk, Neo Soul, and Jazz—rely heavily on subtle note placement to create their unique feel. Without awareness of these timing relationships, it can be difficult to capture the character of those grooves authentically.
Record yourself regularly and track your progress. As this exercise becomes more comfortable, you'll notice greater consistency in your timing, stronger control over the pocket, and a tighter overall groove.
The goal is not simply to play in time. The goal is to choose where your notes sit within the beat and make that choice intentionally.
Why Bass Players Struggle With Groove
There are many reasons a bassist might struggle with groove, but two problems show up more than any others: stopping after mistakes and an inconsistent internal pulse.
Both issues can make it difficult to play bass in the pocket, lock in with a drummer, and maintain a steady groove, even when you know the notes.
1. Stopping After Mistakes
One of the biggest reasons bass players struggle with groove is the habit of stopping every time something goes wrong.
If you've ever found yourself restarting a groove exercise after every mistake, or stopping in the middle of a bass line to figure out what happened, you're not alone. Most players go through this at some point.
The problem isn't the mistake itself. The problem is that the mistake becomes a distraction.
When your attention shifts away from the groove and toward the error, hesitation follows. Sometimes that hesitation is subtle. Other times it causes you to stop completely and start over.
While this feels productive, what you're actually practicing is stopping whenever a mistake occurs.
Over time, that habit can create timing issues, interrupt your sense of flow, and weaken your connection to the rhythmic pulse. Instead of learning how to recover and keep the groove moving, you train yourself to abandon it.
To improve your groove, you must learn to keep going.
Even if you miss a note, lose your place, or play something imperfectly, continue feeling the pulse and moving through the rhythm. The goal is not perfection—it's maintaining time.
If this sounds familiar, don't be discouraged. It's an extremely common challenge.
The first step is simply recognizing the habit. From there, begin shifting your focus away from constant counting and toward feeling the groove internally. When mistakes happen, and they will, you'll be better equipped to stay connected to the pulse and continue playing confidently.
2. An Inconsistent Internal Pulse
The second major reason bass players struggle with groove is an inconsistent internal pulse.
If you constantly need to count in order to stay in time, or if your timing falls apart whenever the metronome drops out, your internal pulse may need development.
An internal pulse is your ability to feel time consistently without relying on external references. It's one of the most important skills for playing bass with good groove because it allows you to maintain steady time regardless of the musical situation.
The groove exercises in this lesson are designed to strengthen that skill.
Practicing these drills daily will help you identify how strong your internal pulse really is and reveal areas where your timing becomes inconsistent. More importantly, they'll help you develop the rhythmic awareness needed to play with greater confidence and consistency.
Many bass players learn songs, memorize tabs, and play along with recordings without ever intentionally developing their internal pulse. As a result, more rhythmically demanding music can feel overwhelming, frustrating, or difficult to execute cleanly.
By incorporating regular rhythm practice into your routine, you can strengthen your internal clock, improve your timing, and build the foundation required for deeper groove.
The better your internal pulse becomes, the easier it is to play confidently, stay locked into the pocket, and create bass lines that feel good.
Beginner Groove Practice Routine
Use this daily bass practice routine to start seeing growth in your timing and internal pulse, typically players start to see improvement in as little as a few weeks of consistent practice.
Daily (10 Minutes)
2 minutes
Up/Down Drill
2 minutes
Quarter Note Pulse
3 minutes
Eighth Note Pulse
3 minutes
On/Ahead/Behind
Consistency beats duration.
Ten focused minutes every day is more valuable than one hour once per week.
What Comes After Rhythm Fundamentals?
Once you can consistently maintain pulse, subdivision, and note placement, you can begin exploring:
note length
ghost notes
harmonic rhythm
pocket within ensembles
These topics build upon the rhythmic foundation established in this lesson.
That's exactly what we'll explore throughout Groove Lab.
Hip Hop Bass Lessons: Using Tension Notes Musically
Why your bass lines lack emotion
If you’re like most bass players then you’ve learned harmony as static chord shapes. You understand the harmonic function of chords and can find the “right” notes , but find it difficult to create interesting textures or vibes. This is because you have yet to learn how notes create motion and tension inside the groove.
The truth is the best bass lines often use notes outside the chord, or scale of the song. These “outside” notes create tension that then releases once an “inside” or “right” note is played. These ideas demonstrate how to connect chords on the bass in an emotional and musical way.
Learning how to add tension to bass lines by using jazz harmony for bass will transform your hip hop bass lines.
How Modern Hip Hop Bass Uses Extensions and Harmonic Color
In modern Hip Hop and Neo Soul, harmony is often built from dense chords that create emotion, tension, and color. The melodies and bass lines interact with these lush harmonies, relying on richly stacked notes to create songs that feel deep, memorable, and expressive.
Many bass players eventually notice that relying only on basic chord tones can cause bass lines to sound thin, repetitive, or emotionally limited in comparison. So how do the best producers, artists, and bass players create richer harmonic movement?
A major part of the answer is that they borrow from the harmonic language of Jazz, Neo Soul, and modern Hip Hop harmony.
To apply these ideas to Hip Hop bass lines, it’s important to develop a strong understanding of harmonic function. Concepts like chord resolution, tension and release, and stacking additional notes onto a chord all become essential for creating more musical and expressive bass movement.
This is where extensions become a game changer.
Extensions transform simple three-note chords into lush, colorful, or spicy harmonies that elevate the emotional impact of a song. Learning how to use extensions intentionally is one of the best ways to make bass lines more interesting while improving your understanding of bass harmony.
The most common three-note chords—major, minor, and diminished triads—are built by stacking notes in thirds.
Triad structure:
Root → Third → Fifth
Extensions continue this same process of stacking thirds above the chord.
Extension order:
7ths → 9ths → 11ths → 13ths
As more notes are added, the harmony becomes denser and more emotionally complex. Instead of expressing a simple or predictable emotion, extended harmony creates tension, color, ambiguity, and movement—the defining characteristics of much of the harmonic language used in Neo Soul and Hip Hop bass playing.
How Modern Hip Hop Bass Uses Leading Tones and Tension Chords
As powerful as extensions are, they are only one part of creating that Neo Soul or Jazz-influenced sound in modern Hip Hop bass lines. Another underrated technique used by many great producers, composers, and bass players is the use of tension chords or color chords.
These are chords borrowed from outside the key that create movement, emotion, and harmonic tension in ways purely diatonic harmony often cannot. Learning how to use these sounds is one of the best ways to make bass lines feel more expressive, musical, and emotionally dynamic.
The foundation of this idea comes from leading tones: notes that naturally resolve up or down by a half step.
Leading tone:
E → F
In Jazz, Neo Soul, and Hip Hop harmony, producers often harmonize these leading tones with full chords instead of treating them like isolated passing notes. This creates richer harmonic movement and stronger tension and release within the groove.
Two of the most common ways to harmonize leading tones are through:
secondary dominant chords
diminished chords
Both approaches create powerful forward motion in bass harmony and are frequently used to connect chords more smoothly in Hip Hop and Neo Soul progressions.
Harmonized Secondary Dominant:
C7 → C E G Bb
Harmonized Diminished Chord:
E° / E diminished → E G Bb
Notice that both chords contain the notes E, G, and Bb. The important idea is that the leading tone, E, which naturally resolves to F, is being harmonized by stacking additional chord tones in thirds above it.
Instead of functioning like a simple passing tone, the leading tone now becomes part of a full tension chord. This is one of the key techniques producers and bass players use to create harmonic color, movement, and emotional depth in modern Hip Hop and Neo Soul bass lines.
How to Practice Harmonic Movement and Tension in Bass Lines
How to Apply Extensions in Hip Hop Bass Lines
When using extensions in Hip Hop bass lines, think carefully about both rhythmic placement and interval relationships.
For example, if a 9th sits between the root and third of a chord, try placing it on a weak beat—such as the "&" of the beat—to connect the surrounding chord tones. This creates stepwise motion, one of the most effective ways to create smooth movement and melodic bass lines.
Instead of jumping between large intervals, the line moves naturally through adjacent notes, creating a stronger sense of groove and harmonic connection.
To explore this concept further, review the King Kunta Groove Lab lesson and pay attention to how stepwise motion creates movement without sacrificing the pocket.
Another practical application of extensions is voice leading.
For example, when moving from Fm7 to Bb7, the note Eb functions as the dominant 7th extension of Fm7. That same note resolves down a half step to D, the major third of Bb7. This creates smooth harmonic movement between chords while helping the bass line sound more intentional and connected.
To practice this concept, download the J Dilla bass arrangement and experiment with the accompanying backing track. Listen for how the extensions naturally pull one chord toward the next.
For a deeper exploration of this idea, read the Groove Lab lesson on Voice Leading.
How to Use Diminished Tension Chords
Diminished chords are one of the most versatile tension chords available to bass players because they can resolve either up or down by a half step and can lead into both major and minor chords.
This flexibility makes them especially useful for creating tension and release in Hip Hop and Neo Soul bass lines.
In the Terrace Martin-inspired Modern Hip Hop/R&B backing track, diminished harmony is used to resolve up a half step into the iv minor chord, creating a brief moment of tension before releasing into the next harmonic destination.
From a groove perspective, these tension chords are often most effective when placed on weak beats immediately before the next chord change.
The goal is to create forward motion without overpowering the groove. If the tension lasts too long, it can distract from the pocket and disrupt the overall feel of the song.
Practice this harmonized tension movement with the Terrace Martin backing track and pay close attention to how the diminished chord changes the emotional pull of the progression. Listen for the moment of tension, then the feeling of release as the harmony resolves.
Final Thoughts
Extensions, leading tones, and tension chords are some of the most powerful tools available for creating movement, color, and emotional depth in Hip Hop bass lines. While many bass players focus exclusively on scales and chord tones, the musicians who create the most memorable grooves learn how to use tension and resolution intentionally.
The goal is not to memorize more theory.
The goal is to hear how bass harmony functions inside the groove and develop the ability to make stronger musical decisions in real time.
That's exactly why Groove Lab exists.
Each Groove Lab lesson combines harmonic concepts, groove analysis, backing tracks, and practical exercises designed to help bass players move beyond simply copying bass lines and start understanding the ideas that make them work.
Whether your goal is writing better bass lines, improving your groove, understanding Neo Soul harmony, or developing a deeper understanding of Hip Hop bass, these concepts become much easier to learn when they are practiced in a musical context.
Over the years I've helped students develop stronger groove, harmonic awareness, improvisation skills, and creative confidence by focusing on practical application rather than isolated exercises. The most successful students aren't necessarily the most technical, they're the ones who learn how rhythm, harmony, and musical intention work together.
If you'd like to continue exploring these ideas:
Download the accompanying worksheet and backing track
Explore the related Groove Lab lessons on voice leading and Hip Hop groove theory
Join the newsletter for weekly bass lessons, practice ideas, and new Groove Lab resources
Apply for private bass lessons if you'd like personalized guidance on groove, bass harmony, improvisation, and musical development
The more you study how tension, groove, and harmonic movement interact, the more expressive and musical your bass lines become.
See you in the next Groove Lab lesson.
Hip Hop Bass Lessons: Hip Hop Groove Theory for Bass Players
How Repetition Creates Strong Hip Hop Grooves
Ever notice how certain Hip Hop bass lines immediately grab your attention and stay stuck in your head for days?
The most effective Hip Hop bass grooves are often not the most technically complex. Instead, they rely on repetition, rhythmic consistency, and feel to create a hypnotic sense of momentum and identity.
In Hip Hop music, repetition creates authority.
A strong repeating bass motif gives the listener something to emotionally and rhythmically anchor to while the rest of the production evolves around it. As drums, vocals, samples, and textures enter and exit the arrangement, the bass line acts as connective tissue that keeps the groove grounded and recognizable.
This concept appears constantly in classic Hip Hop and jazz-hop influenced production.
Take Rebirth of Slick (Cool Like Dat) by Digable Planets for example. The upright bass groove is relatively simple, but its repeating rhythmic motif defines the entire personality of the beat. The groove becomes hypnotic because the listener begins anticipating the repetition, creating a deep sense of pocket and familiarity.
Another strong example is What's the Use? by Mac Miller. Once the bass line enters, it establishes the loose, funky bounce that drives the track forward. The repeating groove creates cohesion between the drums, chords, and melodic textures while reinforcing the laid-back rhythmic feel associated with modern jazz-influenced Hip Hop.
For bass players, this is an important shift in mindset.
Writing strong Hip Hop bass lines is usually less about adding more notes and more about creating memorable repeating rhythmic ideas that reinforce the groove of the beat. In many cases, repetition is what transforms a simple bass riff into the emotional and rhythmic foundation of an entire song.
How Space and Note Duration Shape Hip Hop Rhythm
One of the most overlooked aspects of Hip Hop bass playing is note duration.
Ever notice that where a bass note ends can be just as important as when it begins?
In Hip Hop bass lines, space is what gives the rhythm room to breathe. The most effective Hip Hop bass lines are often built around intentional note length, rhythmic restraint, and strategic silence rather than constant movement.
This is closely connected to the relationship between the bass line and the drum groove.
In many Hip Hop beats, the bass guitar creates forward motion by locking tightly with the kick drum, especially on strong downbeats, while leaving space around the snare on beats 2 and 4. That contrast between impact and silence is part of what creates bounce, swagger, and pocket.
A great example of this concept appears in King Kunta by Kendrick Lamar. The bass line closely follows the kick drum pattern, reinforcing the rhythmic pulse of the beat while using short note durations and space to maintain clarity and momentum. Instead of overcrowding the groove with extra notes, the bass line creates energy through rhythmic alignment and articulation.
This is one of the foundational concepts behind strong Hip Hop bass grooves:
the space between notes is often what creates the feeling of movement.
If you want to apply this concept directly, Groove Lab Study 3 walks you through mapping a drum pattern and how to use that to lock in your own bass lines with an original Hip Hop and Jazz Fusion backing track. It’s a great place to practice interacting with the kick, snare, and the space they create that you just read about.
Understanding Microtiming and Dilla-Inspired Groove
One of the defining characteristics of modern Hip Hop groove is microtiming.
Ever notice how the relationship between notes inside the pocket can completely change the emotional feel of a bass line?
A groove can contain the exact same notes, yet feel dramatically different depending on where those notes sit against the beat.
Much of modern Hip Hop rhythm has been shaped by the influence of J Dilla and his approach to unquantized drum programming. Instead of relying entirely on perfectly straight subdivisions, Dilla combined straight rhythms, swung rhythms, delayed accents, and uneven timing to create grooves that felt deeply human, loose, and emotionally expressive.
This approach fundamentally changed the way many musicians think about Hip Hop bass playing.
For bass players, combining straight and swung rhythms already opens up a much wider rhythmic vocabulary. But when concepts like rhythmic displacement, push-and-pull phrasing, and microtiming are added into the groove, the bass line begins to develop a more conversational and unpredictable feel.
These rhythmic concepts are a major part of what musicians often describe as “the nod”, the instinctive head movement that happens when a groove feels deep, relaxed, and emotionally convincing.
In many ways, this is the foundation of modern Hip Hop Groove Theory:
not just playing in time, but shaping time itself.
If you want to develop a deeper understanding of J Dilla-inspired rhythm, explore the full Dilla Time Groove Lab lesson where we break down swung subdivision, microtiming, rhythmic displacement, and Hip Hop groove concepts for bass players. You can also download the accompanying Hip Hop groove practice kit featuring guided rhythmic exercises, notated drills, and a J Dilla-inspired drum track designed to help you internalize these rhythmic feels through focused practice.
How to Practice Hip Hop Groove on Bass
Use these practical Hip Hop bass exercises to improve your pocket, strengthen your rhythmic awareness, and develop more bounce in your bass lines.
1) Repeat Short Bass Motifs Over Different Chord Changes
Take a simple one-bar Hip Hop bass riff and repeat it over multiple chord changes. Pay attention to how the exact same rhythmic phrase changes emotional character depending on the harmony underneath it.
As you become more comfortable, expand the motif into a two-bar phrase while maintaining the same rhythmic consistency and groove.
This exercise develops one of the most important concepts in Hip Hop Groove Theory:
repetition creates authority.
A repeating bass motif gives the listener something stable to lock into while the harmony and production evolve around it.
If you need practice material, use this Hip Hop groove backing track designed for Groove Lab rhythmic studies.
2) Practice Leaving Space Around the Snare Drum
One of the most important Hip Hop bass techniques is learning how to create groove through space and note duration.
Using the King Kunta bass arrangement as a reference, practice the quarter note → eighth note rest → eighth note rhythmic pattern slowly and intentionally. Pay close attention to the rest on beat two where the snare drum lands.
That moment of silence is part of what creates the bounce.
The goal is not simply to count the rhythm correctly, but to emotionally internalize the feeling of leaving space for the snare while staying connected to the groove.
Once the rhythmic feel becomes natural, begin applying the same concept to other Hip Hop bass lines while maintaining that strong relationship between the kick drum, snare, and bass note placement.
For a deeper breakdown of this concept, revisit the King Kunta Hip Hop Bass Lesson and bass arrangement worksheet focused on bounce, pocket, and rhythmic alignment.
3) Practice Straight Time, Swing, and Dilla-Inspired Microtiming
Take two simple triads with roots on the same string and practice arpeggiating them while alternating between:
straight subdivisions
swung subdivisions
Dilla-inspired microtiming
This exercise helps develop flexibility in your internal sense of time and strengthens your understanding of modern Hip Hop rhythm.
Focus on making each rhythmic feel emotionally distinct rather than mechanically correct. The goal is to internalize how small timing changes completely alter the feel of a groove.
To explore these concepts further, study the Dilla Time Groove Lab lesson and download the Hip Hop Groove Practice Kit featuring guided rhythmic exercises, notation examples, and a J Dilla-inspired drum track for focused groove practice.
Continue Developing Your Hip Hop Groove
If you want to improve your pocket, rhythmic confidence, and understanding of modern Hip Hop bass playing, Groove Lab was designed to help you practice these concepts in a musical and intentional way.
Each week, Groove Lab explores:
Hip Hop bass lines
groove theory
pocket and timing
jazz-informed harmony
J Dilla-inspired rhythm concepts
articulation and feel
guided practice systems for bass players
You’ll also get access to free bass arrangements, backing tracks, practice kits, and breakdowns designed to help you internalize these ideas through real music.
Hip Hop Bass Lines: King Kunta
Most bass players approach hip hop bass lines by focusing on the notes first.
But on tracks like “King Kunta” by Kendrick Lamar, the groove does most of the work.
The bass line isn’t complex harmonically, but the feel, placement, and interaction with the drums create the identity of the track.
This is where a lot of players struggle.
They can identify the notes, but the groove doesn’t translate.
In this lesson, we’re going to break that down in a practical way.
We’ll start by analyzing the original bass line—focusing on rhythm, phrasing, and how it locks in with the drums.
Then, we’ll take those concepts and apply them to a new arrangement, using the same musical context as a foundation for writing a fresh bass line.
The goal isn’t just to learn this part.
It’s to understand how to build hip hop bass lines that feel right.
First let’s listen to the original bass line in context
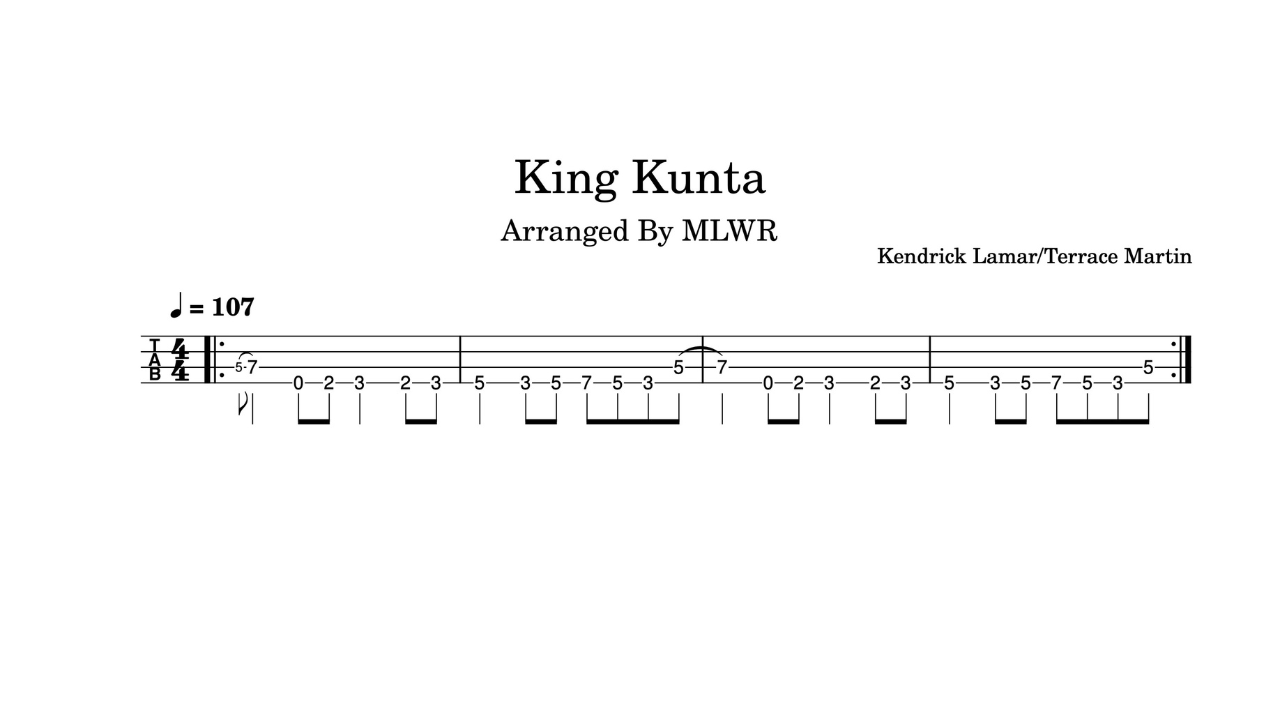
Rhythmic Analysis
The groove on “King Kunta” by Kendrick Lamar is built around a repeating two-bar phrase, centered on a simple motif: a quarter note followed by two eighth notes.
On paper, that’s straightforward.
What makes it work is where those eighth notes land.
They consistently fall around beats 2 and 4, creating a sense of anticipation that pushes into the next downbeat. This placement gives the line its forward motion and contributes directly to the track’s “bounce.”
Just as important is how the bass locks in with the kick drum pattern (1, 2+, 3, 4).
The alignment between the bass phrasing and the kick is what stabilizes the groove. Even when the rhythm feels slightly pushed, that relationship keeps everything grounded.
The phrase resolves with an eighth note that glissandos into the next downbeat.
That detail matters.
It’s not just a transition—it reinforces the cyclical nature of the groove and keeps the line feeling connected across phrases.
This is a clear example of how a simple rhythmic idea, when placed intentionally, can define the feel of an entire track.
Harmonic Analysis
Harmonically, “King Kunta” by Kendrick Lamar is built on a two-chord vamp: E minor to F# minor, suggesting a broader context of D major.
On the surface, this is a simple progression.
What makes it effective is how the bass line uses motion and placement to create interest without overcomplicating the harmony.
The phrase begins with a glissando from the flat 7 up to the octave. This is played on the A string rather than the D string, keeping the line in a lower register and maintaining a deeper, more consistent timbre that blends with the groove.
From there, the line outlines the chord using familiar scale motion:
root to 9 (eighth notes)
resolving to the minor 3rd (quarter note)
This is straightforward, but intentional. The clarity of these chord tones grounds the groove.
The next movement introduces subtle variation:
a quick return to the 9
followed again by the minor 3rd
Even without using blue notes, the line maintains forward motion by consistently pushing toward the next downbeat.
That motion becomes more apparent at the transition into the second measure.
The line lands on A, which functions as the minor 3rd of F# minor. This is a clear example of voice leading—connecting the harmony smoothly from one chord to the next without breaking the flow of the groove.
From here, the same melodic concept is developed further.
A short ascending figure (G → A → B) introduces additional color:
G (flat 9)
A (minor 3rd)
B (11th)
This is one of the few moments where the line expands harmonically, adding tension and color while still staying connected to the chord.
At the same time, the rhythm briefly shifts—moving away from the original motif into a run of consecutive eighth notes.
That change matters.
It creates contrast within the phrase, preventing the groove from becoming static while still maintaining overall cohesion.
The line then descends (B → A → G), before landing on D (flat 13), which glissandos back into the octave—resetting the phrase and reinforcing the loop.
Why This Works
This bass line is a strong example of how simple harmony can feel rich through motion, phrasing, and voice leading.
It doesn’t rely on complex chord changes.
Instead, it develops interest through:
clear chord outlining
stepwise motion
strategic use of extensions
and smooth transitions between chords
For bass players, this is the key takeaway:
👉 You don’t need more chords, you need better connection between them.
That’s what creates a bass line that feels both grounded and musical within a modern hip hop groove.
Writing our own Hip Hop Bass Line using the Groove Lab system
Now that we’ve learned and analyzed what was played on King Kunta, we can use the Groove Lab system to transform this bass line into something new
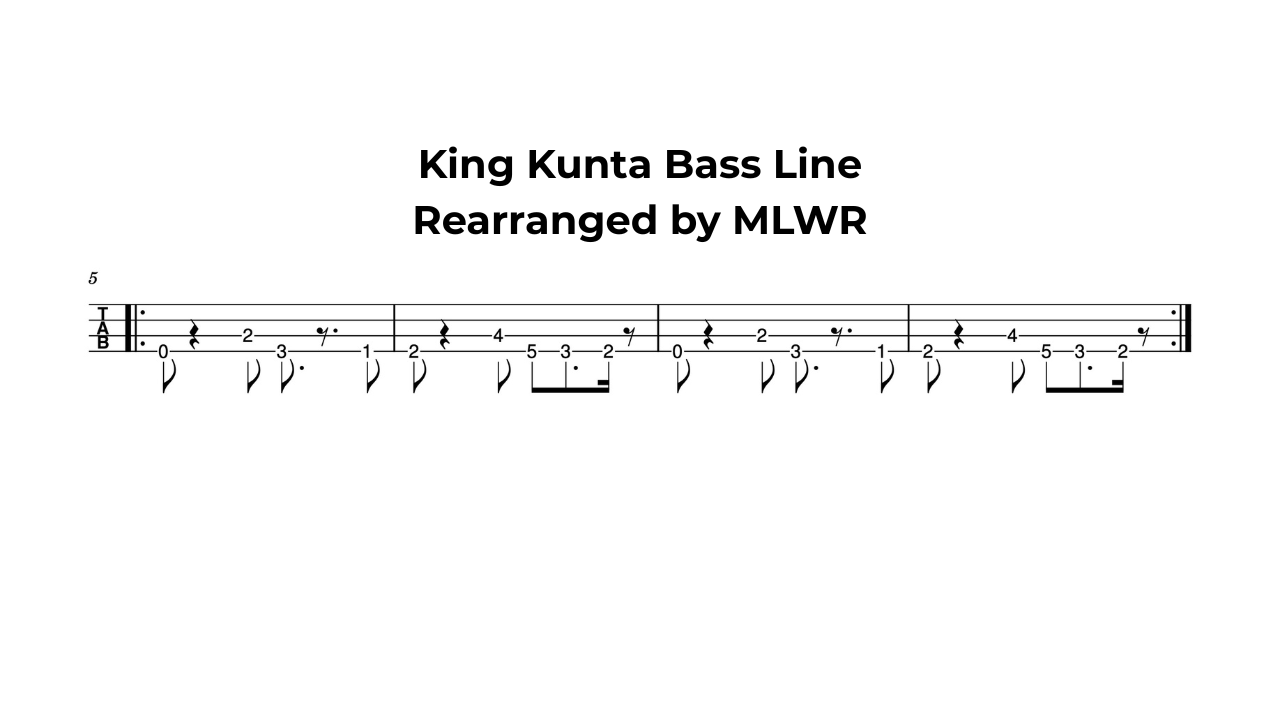
Rhythmic selection
What’s already working rhythmically is that the bass line is tied to kick drum and blends ¼ note and 1/8 note phrasing. This results in the bass anchoring the groove and creating a subtle “bounce”.
What we want to change, let’s add more dramatic “bounce” and “head nod” in the feel, without losing the vibe that already exists.
We can achieve those goals by adding in intentional rests, creating syncopation that is less predictable and more musical. We can also add staccato phrasing to our bass line, which gives more room for the kick and snare to breathe.
On beat 1, play an 1/8-note pulse that locks tightly with the kick.
The “+” of beat 1 and the downbeat of beat 2 are rests. This creates space for the snare to speak clearly and allows the groove to breathe.
The “+” of beat 2 plays an 1/8-note pulse, creating anticipation into beat 3.
On beat 3, play a dotted 1/8 note (equivalent to three 1/16 notes). This creates a slightly extended rhythmic feel that pushes against the grid in a controlled, musical way.
The last 1/16 of beat 3 is a dotted 1/8 rest, lasting three 1/16 notes and carrying us from the end of beat 3 into the downbeat of beat 4.
On the “+” of beat 4, play an 1/8 note, creating lift and forward motion into the next measure.
Measure 2 repeats this same rhythmic idea through beat 2.
On beat 3 of measure 2, play an 1/8 note followed by a dotted 1/8 note, which displaces the next articulation so that it lands on the “e” of beat 4.
The “+” of beat 4 is an 1/8-note rest, leaving space before the cycle resolves into the next bar.
The use of intentional note duration, syncopation, 1/16 note phrasing, adding in purposeful rests all create a stronger hitting groove.
These are all ideas explored by the producer J Dilla, read this lesson to learn more about creating hip hop bass grooves.
Harmonic selection
When choosing notes for a hip hop bass line, every note should serve one of three functions:
Outline the chord
Lead by half-step into the next note
Extend the harmony (chord tones beyond the triad)
This framework shifts your playing from guessing or relying on patterns → to intentional note placement that controls tension and release.
What’s already working in this line is the use of:
extensions
stepwise motion (moving through the scale in sequence)
These elements help round out the harmony and connect the bass line to the rest of the band.
What We Want to Improve
Because the rhythm has become more complex, the harmony needs to simplify.
We’ll:
reduce the number of extensions
keep stepwise motion where it supports the line
This creates clarity and balance between rhythm and harmony.
Measure 1 Breakdown
Beat 1 (downbeat): E
The root of the chord. This clearly establishes the tonal center and grounds the listener.“+” of Beat 2: B
The 5th of the chord. Strong, stable chord outlining.Beat 3 (downbeat): G
The minor 3rd. This completes the core triad and reinforces the chord quality.“+” of Beat 4: F
This note is outside the key and chord.
It functions as a chromatic leading tone, pulling into the next measure.
Measure 2 Breakdown
Beat 1 (downbeat): F#
The root of the new chord.
The resolution from F → F# is a classic chromatic approach, commonly used in hip hop bass lines.“+” of Beat 2: C#
The 5th of the chord. Clear harmonic support.Beat 3 (downbeat): A
The minor 3rd. Again, completing the triad.
At this point, we’ve repeated the same structure from measure 1:
👉 Root → 5th → minor 3rd
This repetition creates cohesion and stability, giving the listener something consistent to latch onto.
Where the Line Evolves
“+” of Beat 3: G
Using a descending line with stepwise motion“e” of Beat 4: F#
This creates a smooth, connected motion back into the root.
Key Takeaway
This line demonstrates an essential principle:
As rhythmic complexity increases, harmonic complexity should decrease.
We maintain:
strong chord outlining (root, 5th, minor 3rd)
stepwise motion for connection
But reduce:
unnecessary extensions
The Result
clearer groove
stronger harmonic foundation
more intentional phrasing
Instead of filling space, every note now has a defined role in shaping the line.
Continue the study
With the downloadable King Kunta Bass Tab Worksheet, a Groove Lab resource focused on groove, phrasing, articulation, and harmonic movement in modern hip hop bass playing.